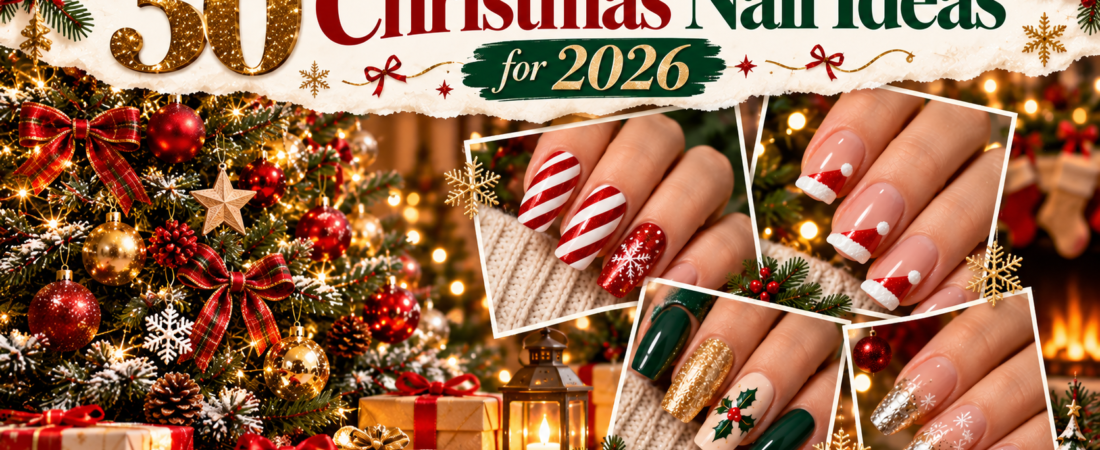
Christmas is the perfect excuse to have a little fun with your nails. Maybe you love classic red and green, or perhaps you prefer soft neutrals with just a hint of sparkle. Whatever your style, there are so many ways to give your manicure a festive touch without going overboard.
For 2026, Christmas nail art can be as simple or as detailed as you like. Some designs need just a few colors and a steady hand, while others are all about glitter, texture, and tiny decorative details. And the best part? You don’t have to be a professional nail artist to try many of these looks at home. From timeless holiday favorites to playful designs with a little personality, here are 31 Christmas nail ideas worth saving for your next manicure.
1. Classic Candy Cane Nails
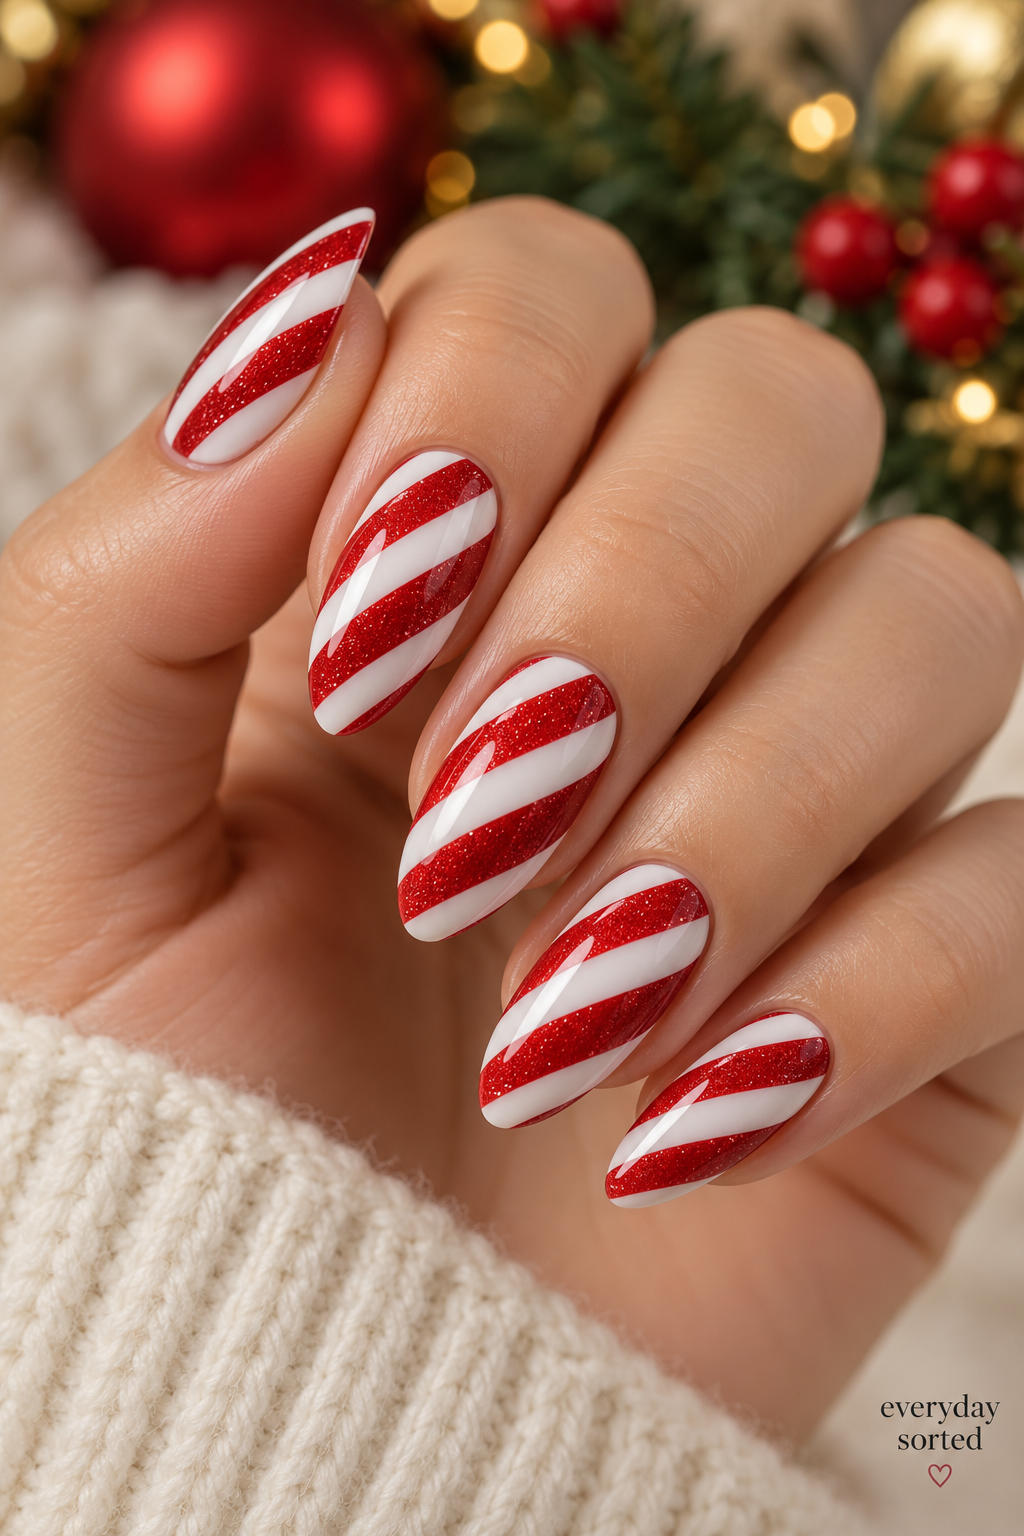
There’s something about red-and-white candy cane nails that instantly feels like Christmas. Start with a white base coat and let it dry completely before painting thin diagonal red stripes across each nail with a fine nail art brush. Don’t worry if every stripe isn’t perfectly identical; a little variation can make the design feel more natural. Finish with a glossy top coat to bring out those cheerful, candy-inspired colors.
2. Holly Berry Accent Nails
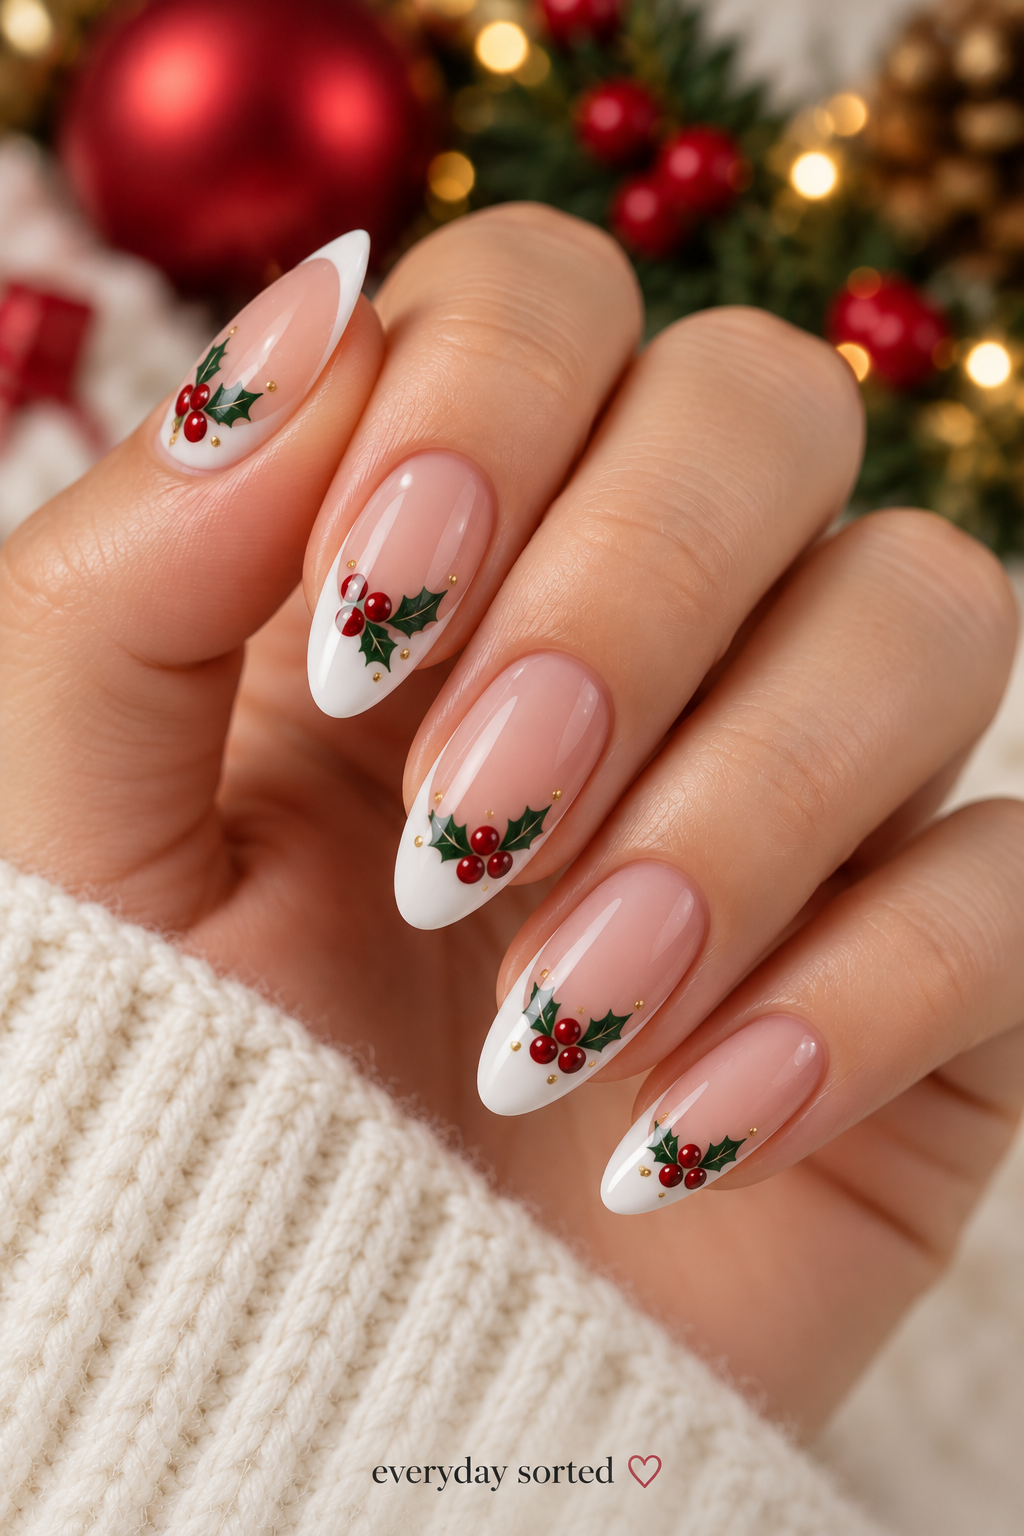
If you want a festive design that still feels delicate, holly berries are a lovely choice. Apply a sheer nude or milky pink base, then paint a few small green leaves on one or two accent nails. Add tiny red dots between the leaves using a dotting tool or the tip of a toothpick. Keeping the details small helps the design look elegant rather than busy, especially against a soft, neutral background.
3. Mistletoe Magic Nails
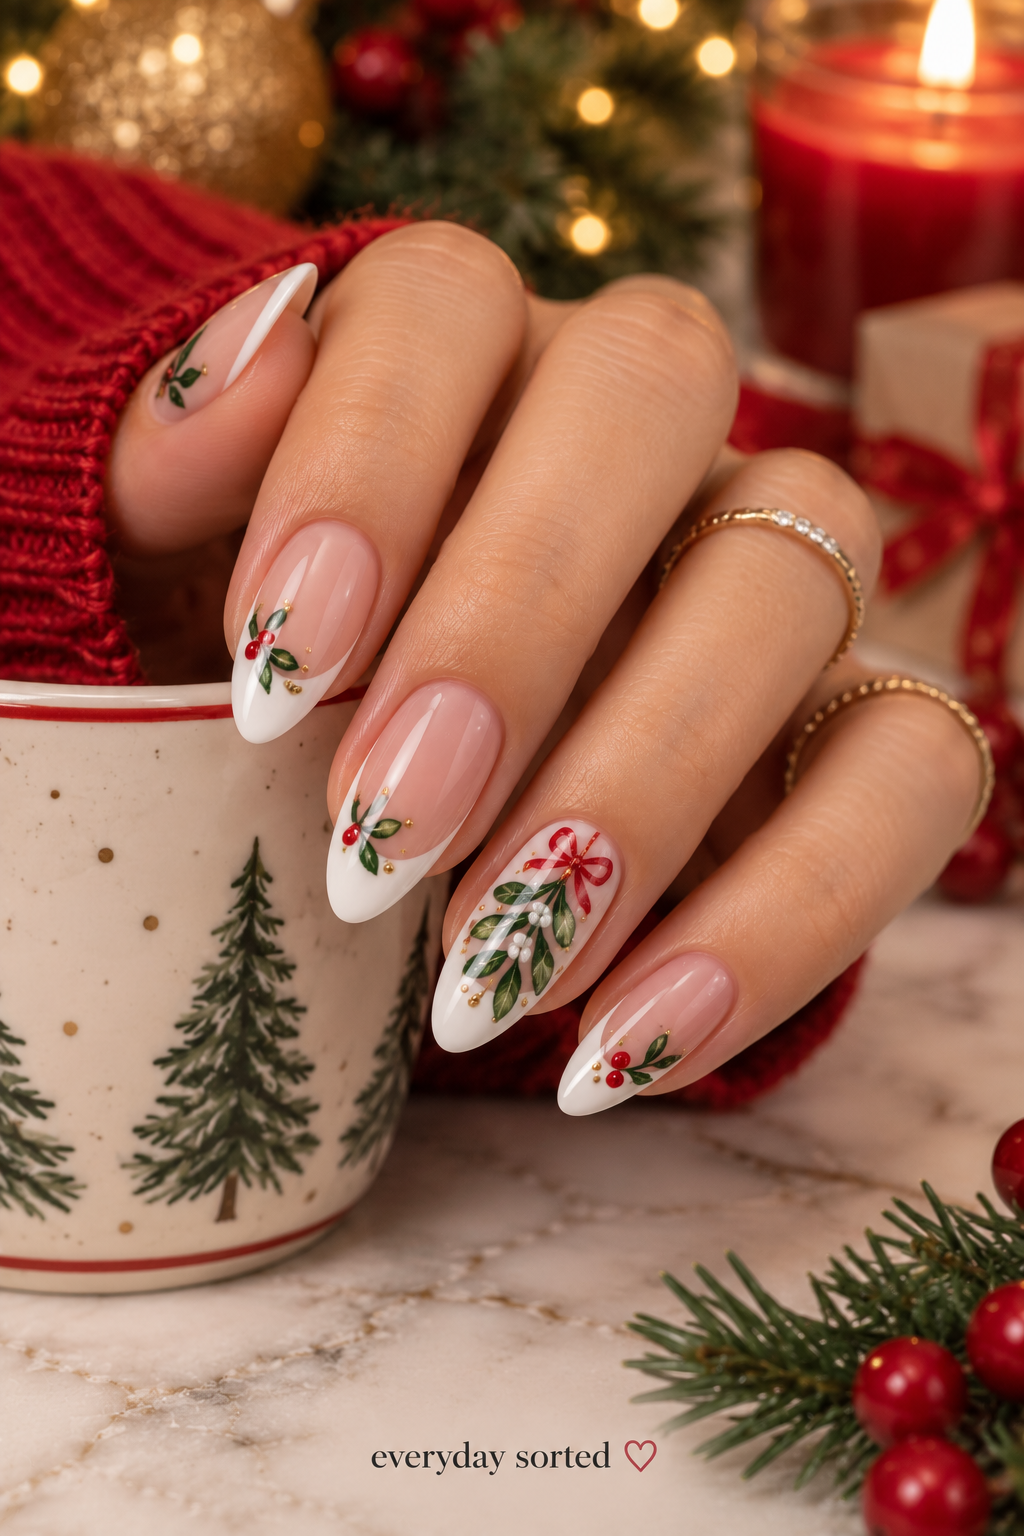
Mistletoe nail art has a quiet charm that makes it stand out from the usual Christmas colors. Begin with a pale pink or creamy nude polish, then use a fine brush to draw slender green stems on your ring fingers. Add small pairs of oval leaves and finish with a few delicate white berries. You don’t need to cover the entire nail; leaving plenty of open space makes the little botanical design easier to appreciate.
4. Red and Green Skittle Nails
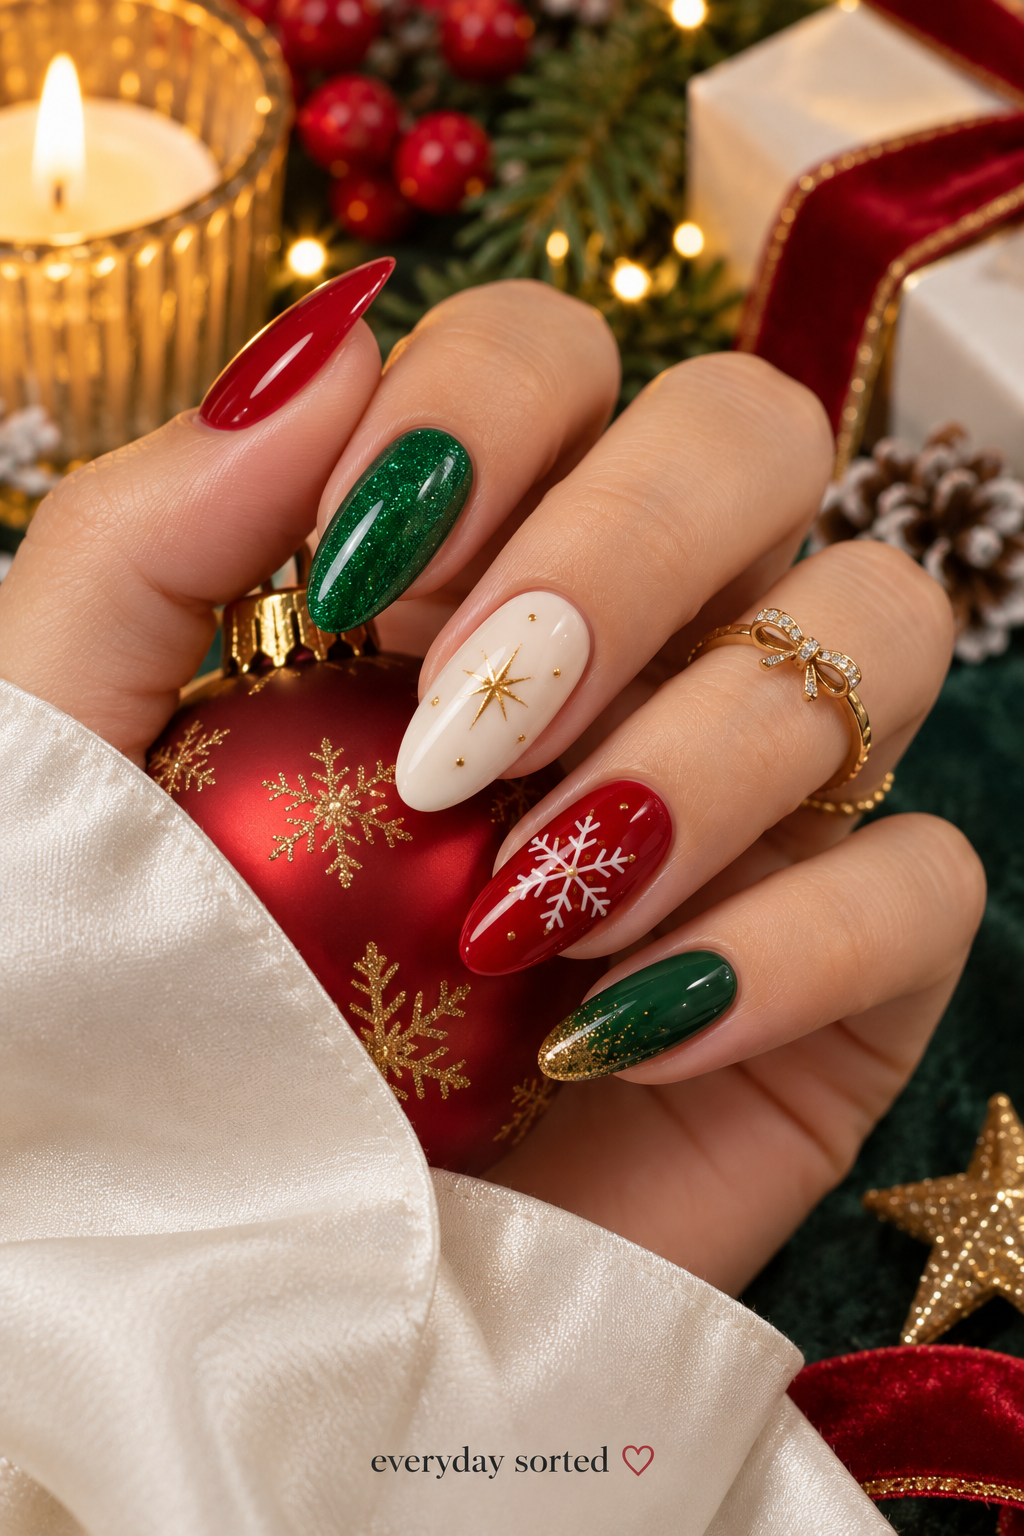
Can’t decide between red, green, gold, and cream? You don’t have to choose just one. Skittle nails let you paint each fingernail a different shade, so start by selecting a small palette of complementary Christmas colors. Try deep red, forest green, warm gold, and soft ivory for a balanced look. Apply two thin coats of each polish, then finish with a glossy top coat to tie the different colors together.
5. Santa Hat French Tips
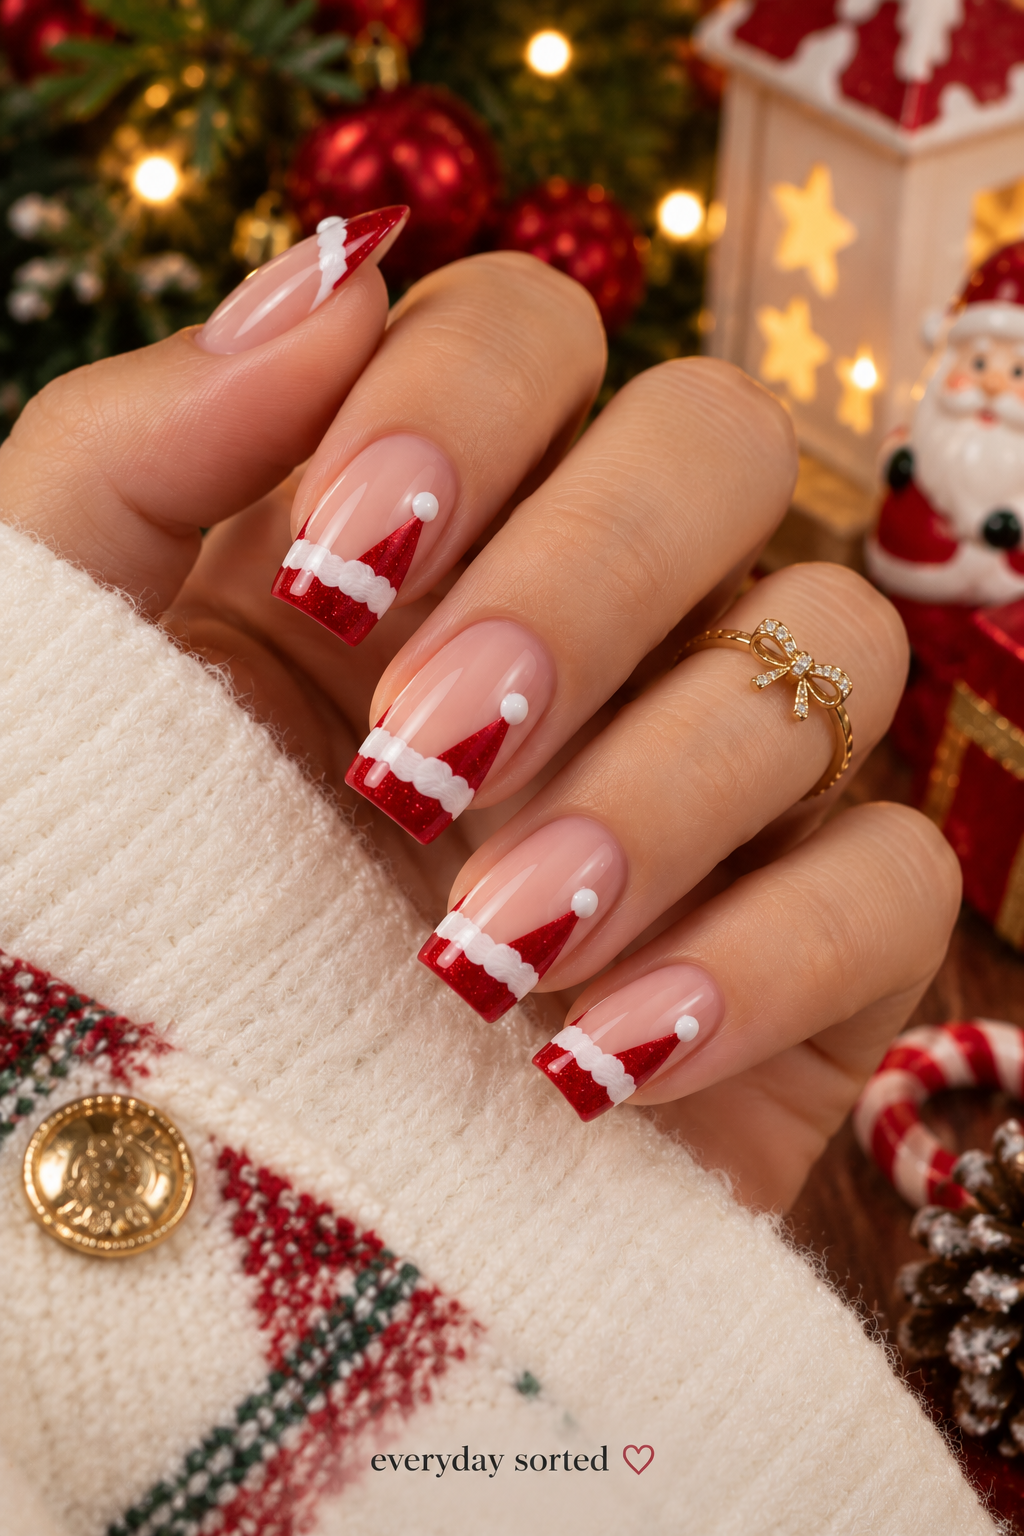
This design gives the classic French manicure a playful Christmas makeover. Begin with a sheer pink or nude base, then shape each tip into a small red Santa hat using a nail art brush. Add a thin white line along the bottom of each red tip and a tiny white pom-pom near one corner. The details work best when the hats are kept small, so there’s still plenty of room for the natural-looking base to show through.
6. Gift Wrap Bow Nails
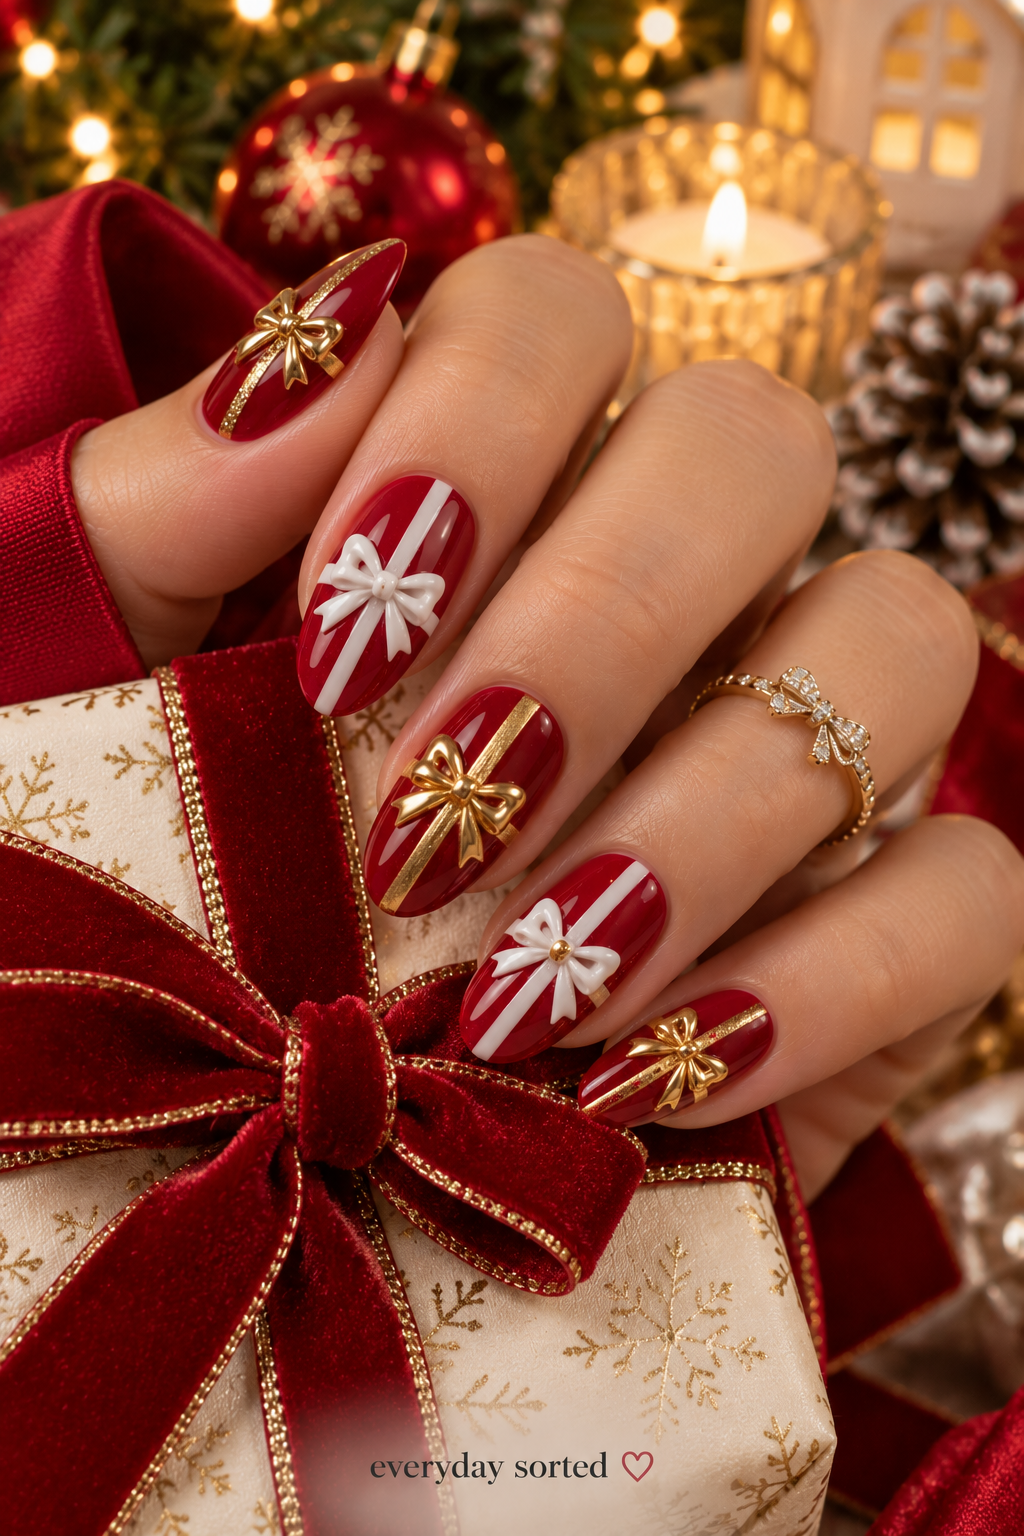
Think of these nails as tiny Christmas presents, complete with pretty ribbon details. Paint your nails a rich crimson or deep red, then use a fine brush to create thin white or gold lines that cross like gift-wrap ribbon. Add a small bow where the lines meet, either by painting two loops and two short tails or using a ready-made nail art charm. A glossy finish helps the red look especially rich and makes the details pop.
More to Read:
1: 10 Best Fall Nail Polish Colors for 2026: Cherry, Mocha & Brown Shades
2: Fall 2026 Beauty Trends: 15 Looks You’ll Be Seeing Everywhere This Season
7. Shimmering Tinsel Nails
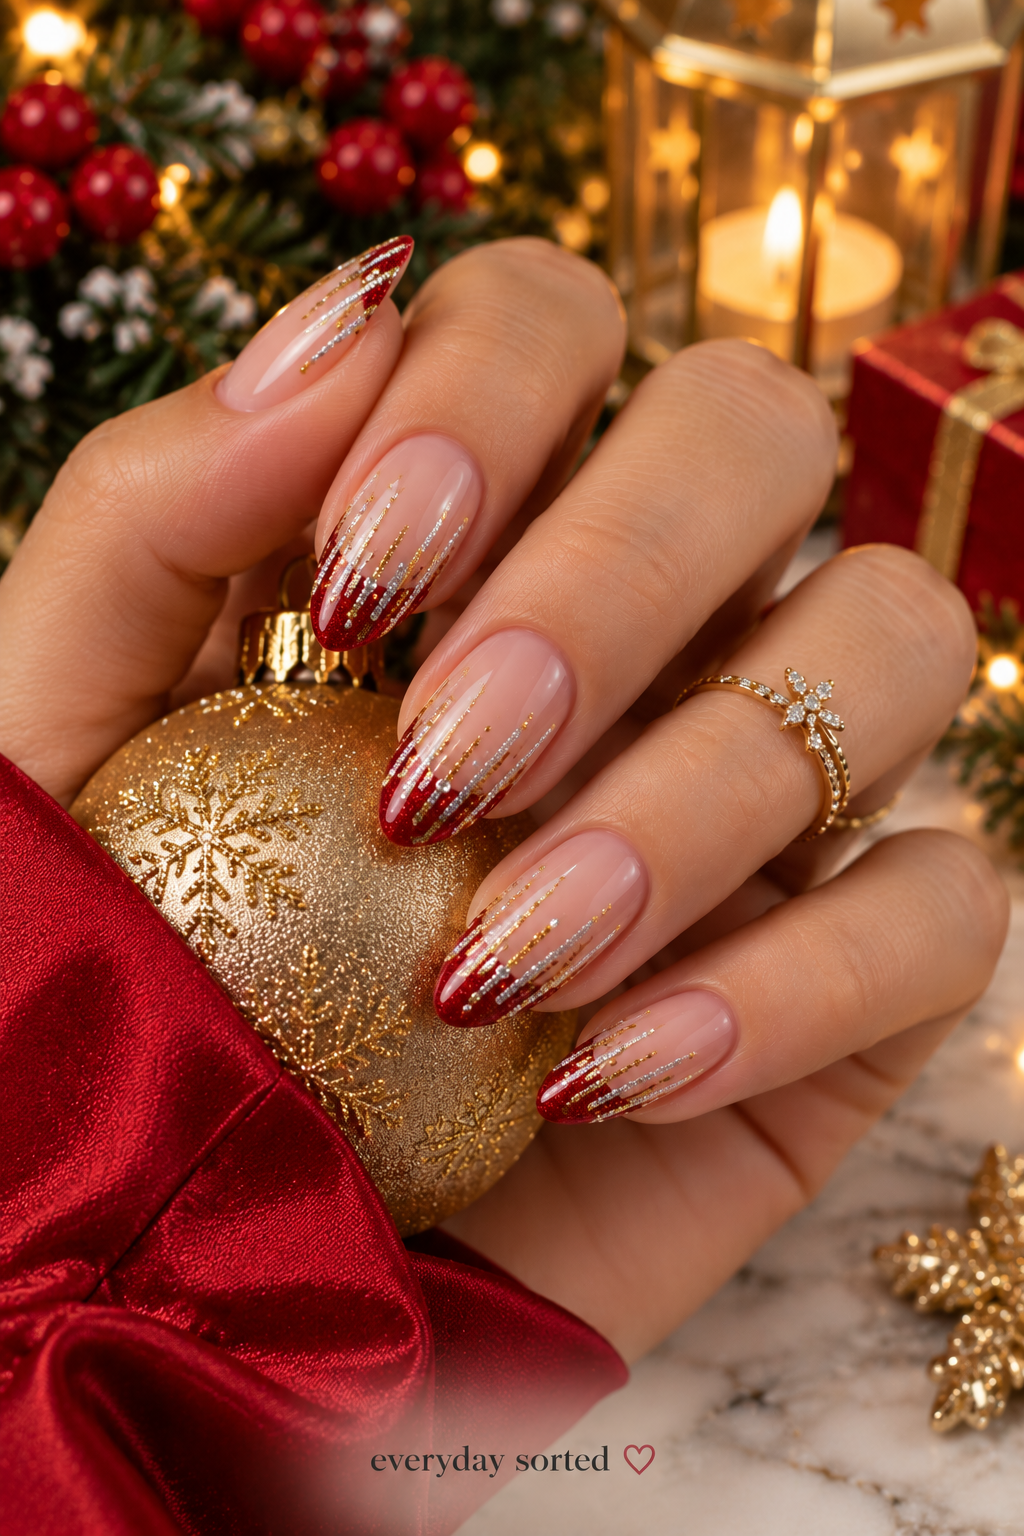
For anyone who loves sparkle but doesn’t want chunky glitter on every nail, tinsel-inspired designs are worth trying. Choose a deep green, navy, burgundy, or black base, then paint a few fine vertical lines in silver or metallic gold. Let some lines remain slightly uneven to mimic the loose strands of Christmas tinsel. You can keep the effect subtle with just two or three lines per nail, or add more for a brighter, more festive finish.
8. Neutral Half-Moon Wreath Nails
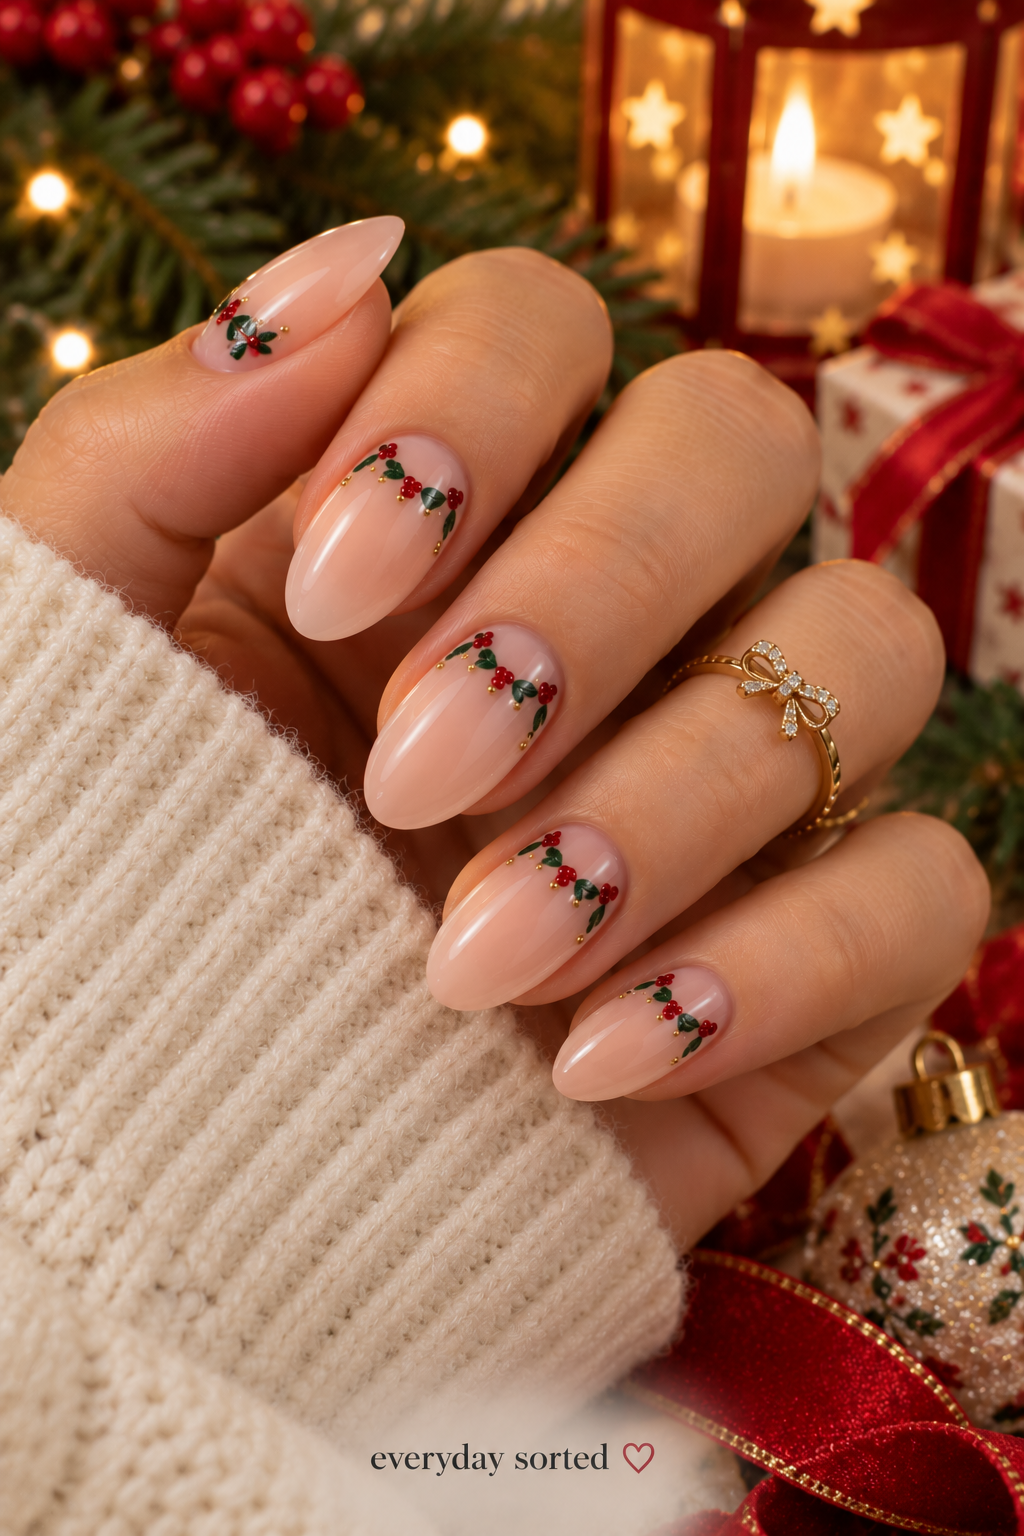
A neutral manicure can feel festive, too, especially when the details are thoughtfully placed. Apply a beige, blush, or milky nude base and allow it to dry. Using a dotting tool, arrange tiny dark green dots in a curved shape near the base of each nail to suggest a miniature wreath. Add one or two red dots for berries if you’d like a little extra color. Leave enough space around the design so it stays crisp and understated.
9. Velvet Emerald Cat-Eye Nails
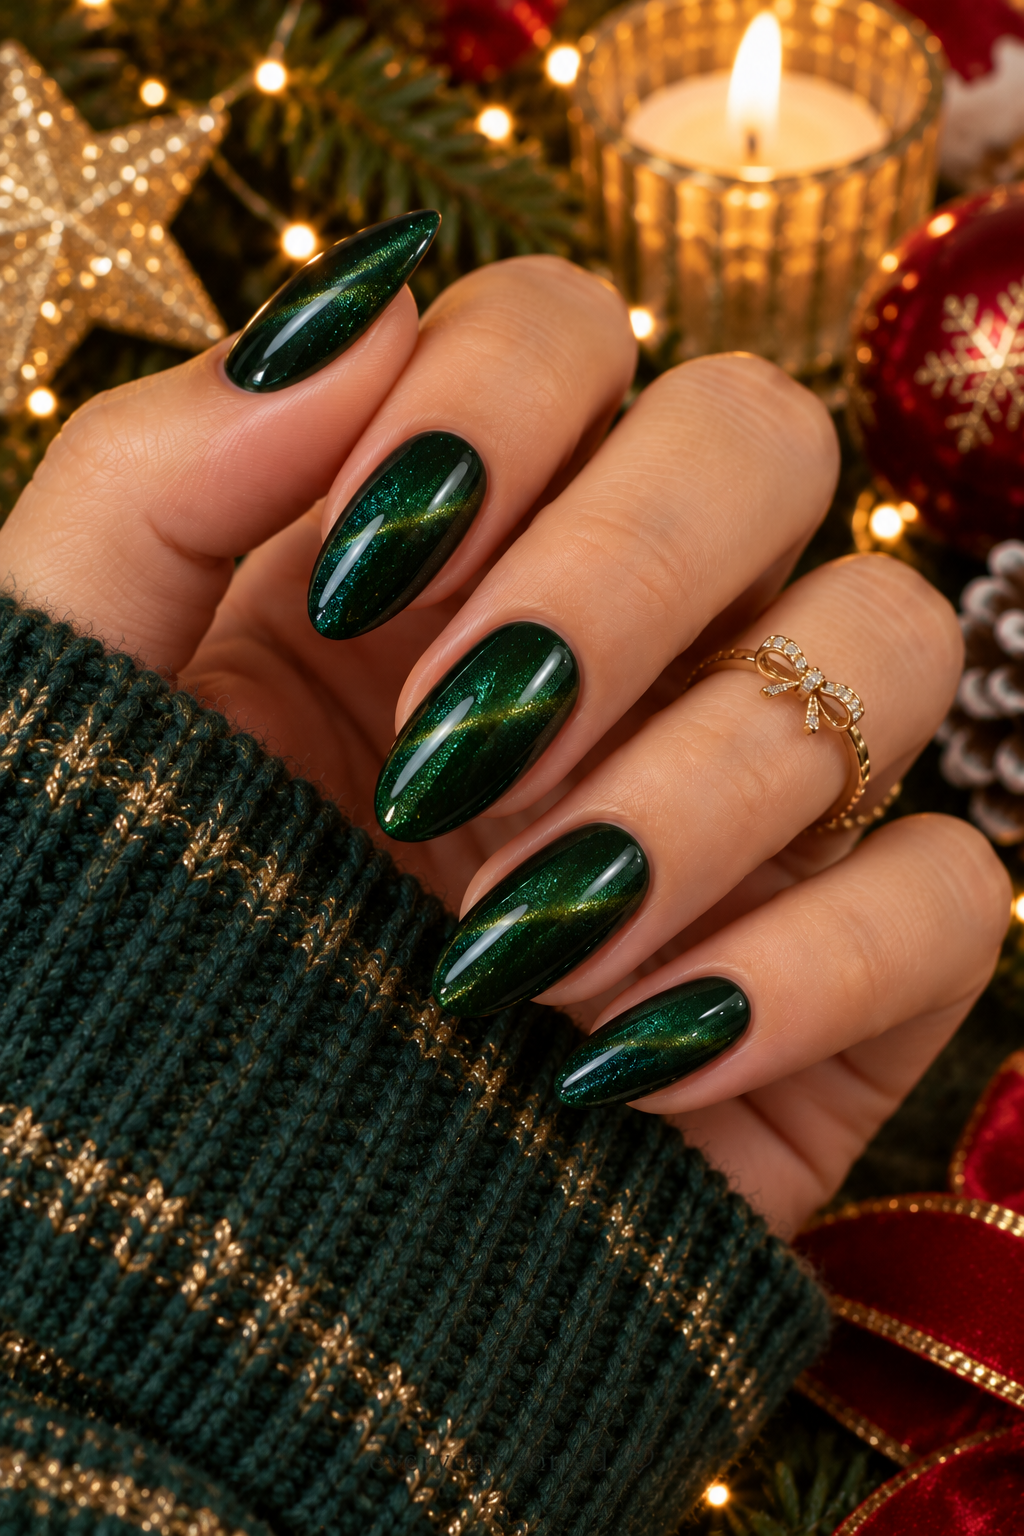
Deep emerald nails already feel luxurious, but a magnetic cat-eye polish gives them an extra dimension. Apply a dark green cat-eye gel polish, then hold the magnetic tool above each nail according to the product’s instructions to pull the shimmer into a glowing line or soft, velvet-like reflection. Cure the polish as directed and finish with the recommended top coat. Move your hands under the light afterward—the shifting green glow is what makes this manicure so beautiful.
10. Espresso Cozy Stripe Nails
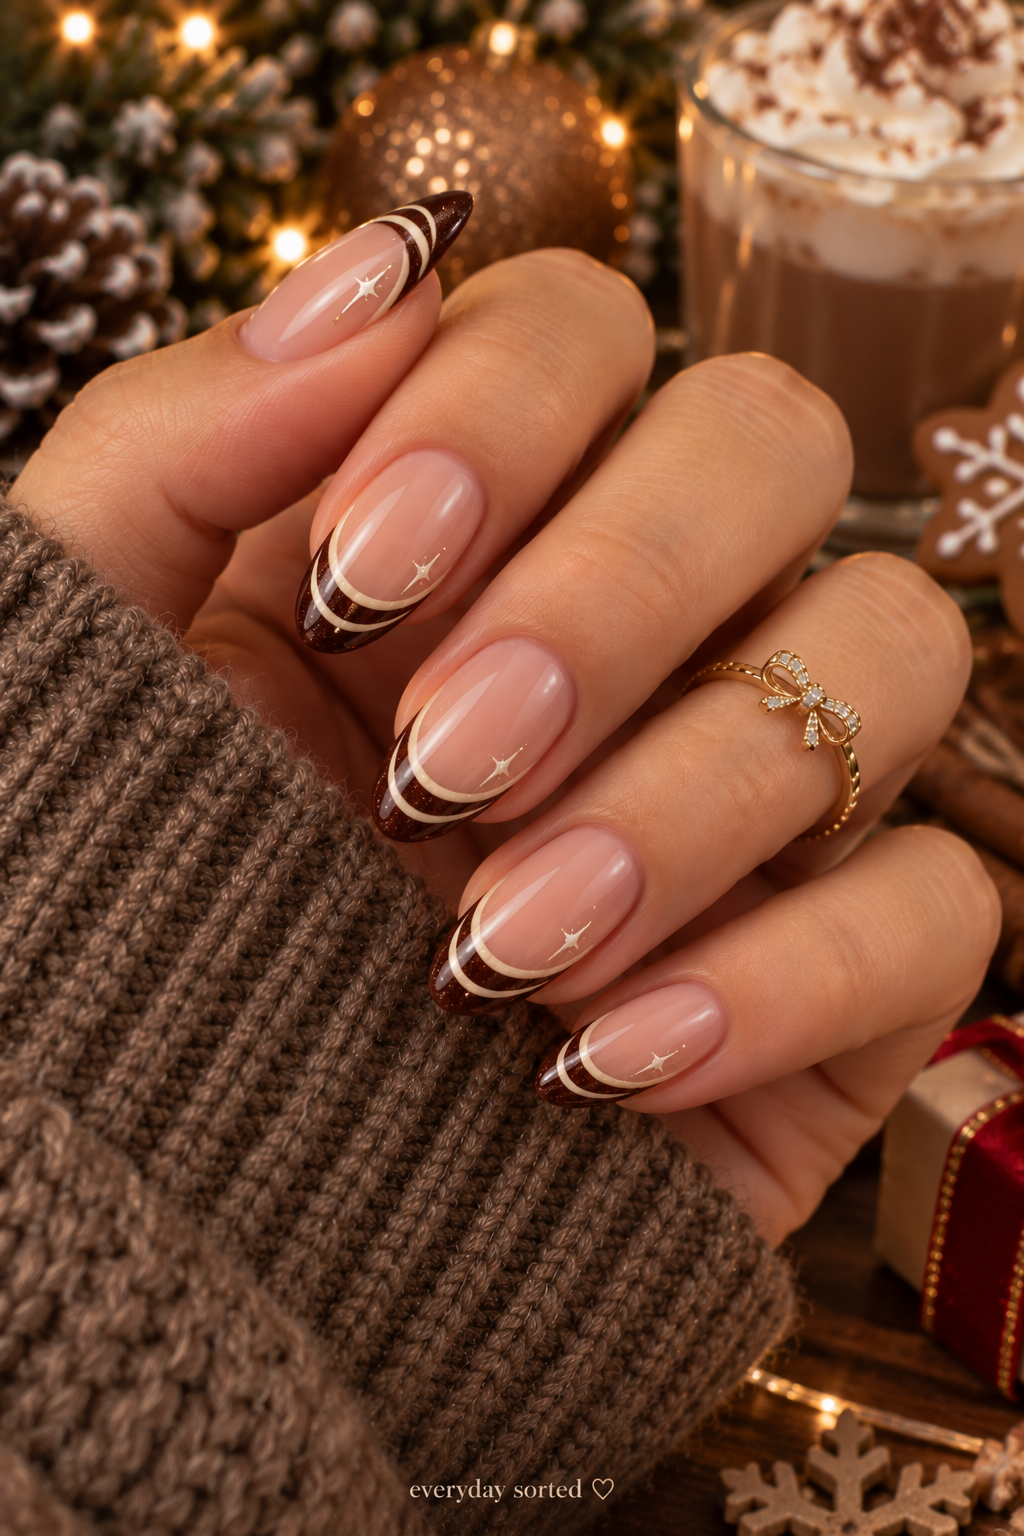
Not every Christmas manicure needs bright red or glitter. Espresso nails offer a warmer, more understated take on the season. Start with a mocha or coffee-brown base and add a few thin cream stripes using a striping brush. You could place them vertically, diagonally, or in a simple alternating pattern. Keep the lines delicate rather than filling the nails with detail; the contrast between the creamy stripes and rich brown polish is enough to make the design feel finished.
11. Rose Gold Abstract Swirl Nails
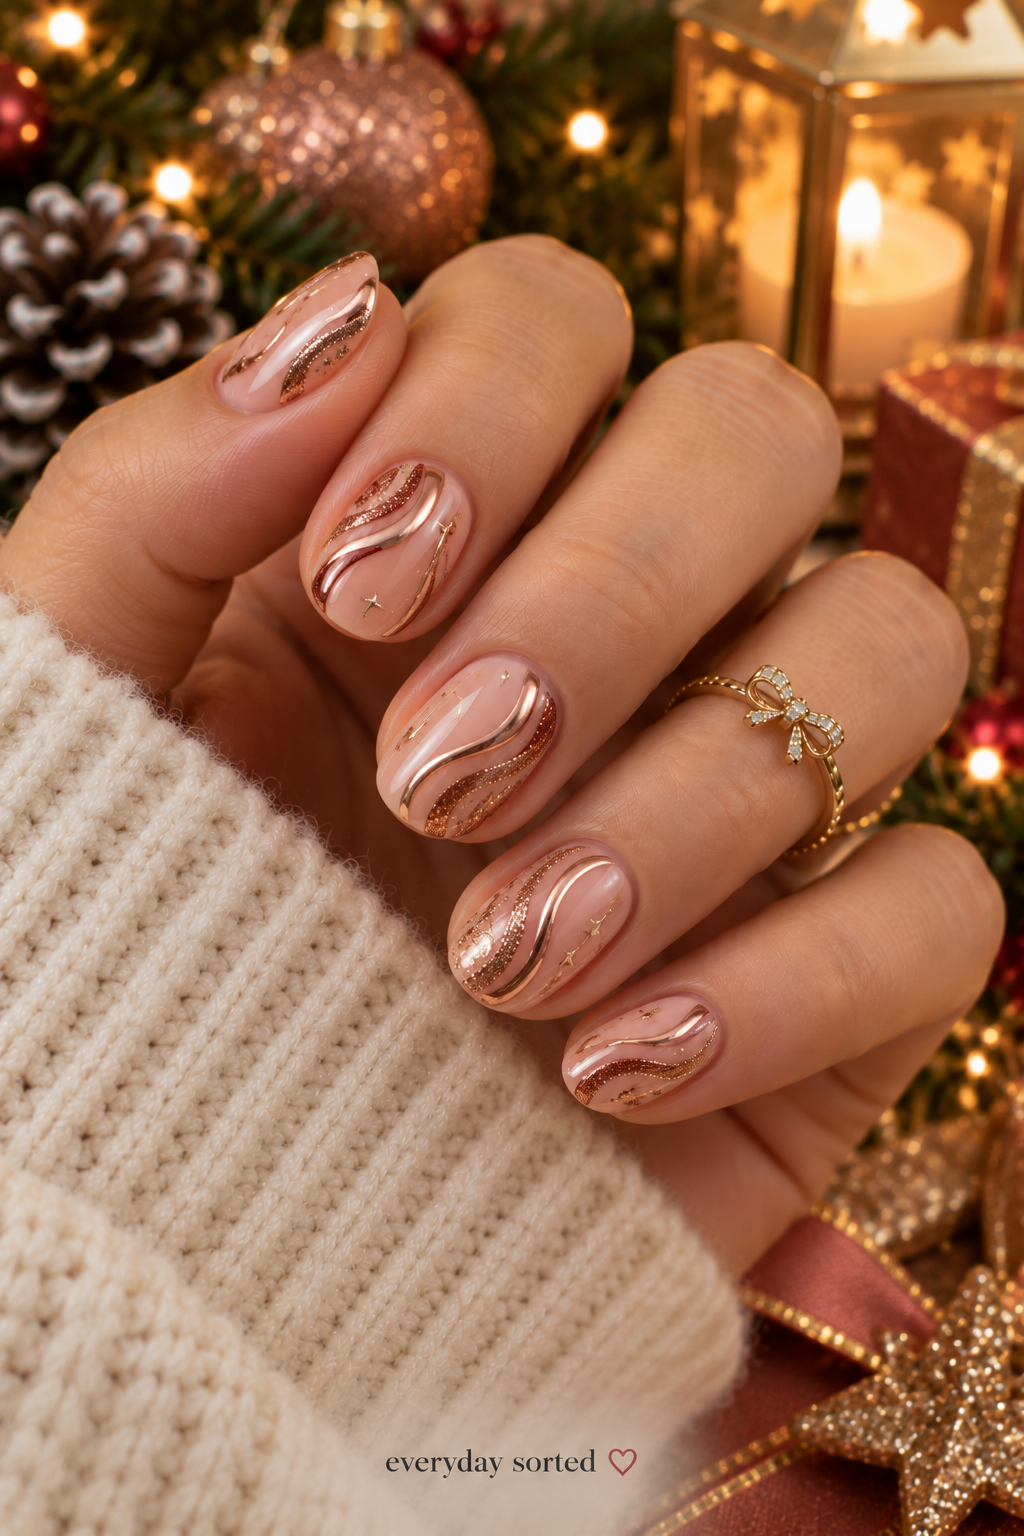
Rose gold is a beautiful option when you want something festive without relying on traditional Christmas colors. Begin with a sheer pink, nude, or milky base, then paint loose, flowing swirls with rose gold metallic polish. A fine liner brush gives you better control over the curves, but the lines don’t need to match from nail to nail. In fact, slightly different swirls make the set feel more artistic. A glossy top coat brings out the metallic shine.
12. Thin Pine Sprig Nails
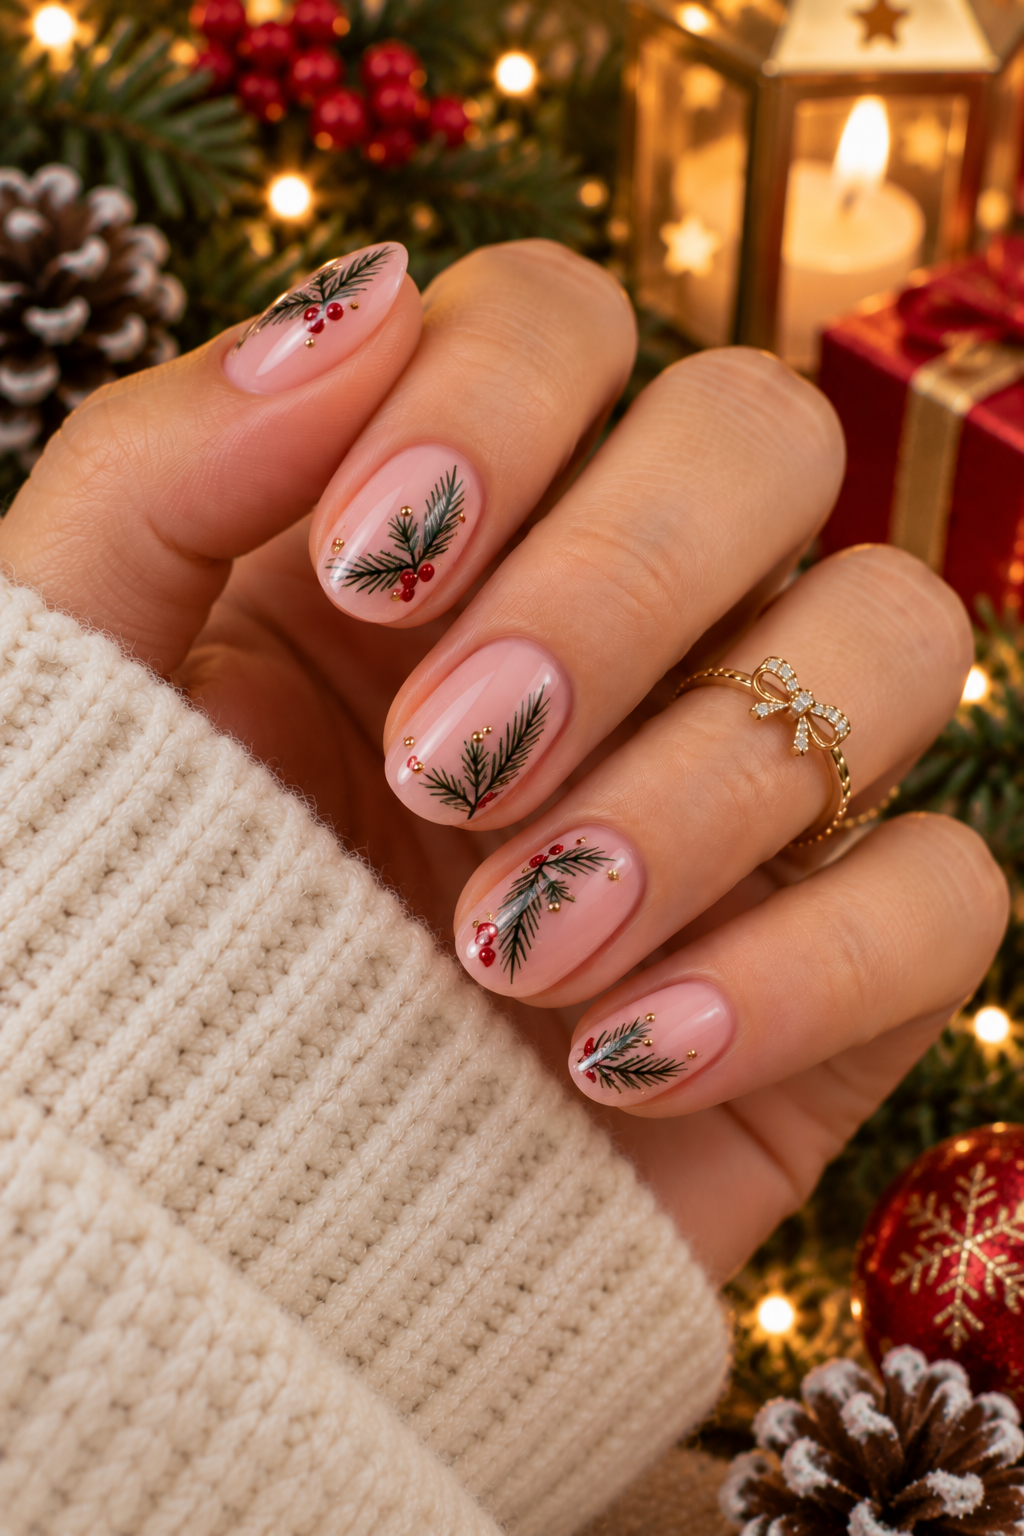
Tiny pine branches can turn a simple manicure into something that feels like a winter woodland. Choose a pale pink, nude, or creamy white base so the dark green details stand out. With a fine nail art brush, draw a thin central line and add short angled strokes on either side to create the pine needles. You can place one sprig on each accent nail or spread the branches across the set. Keep your strokes light for a delicate finish.
13. Ruby Red Chunky Glitter Nails
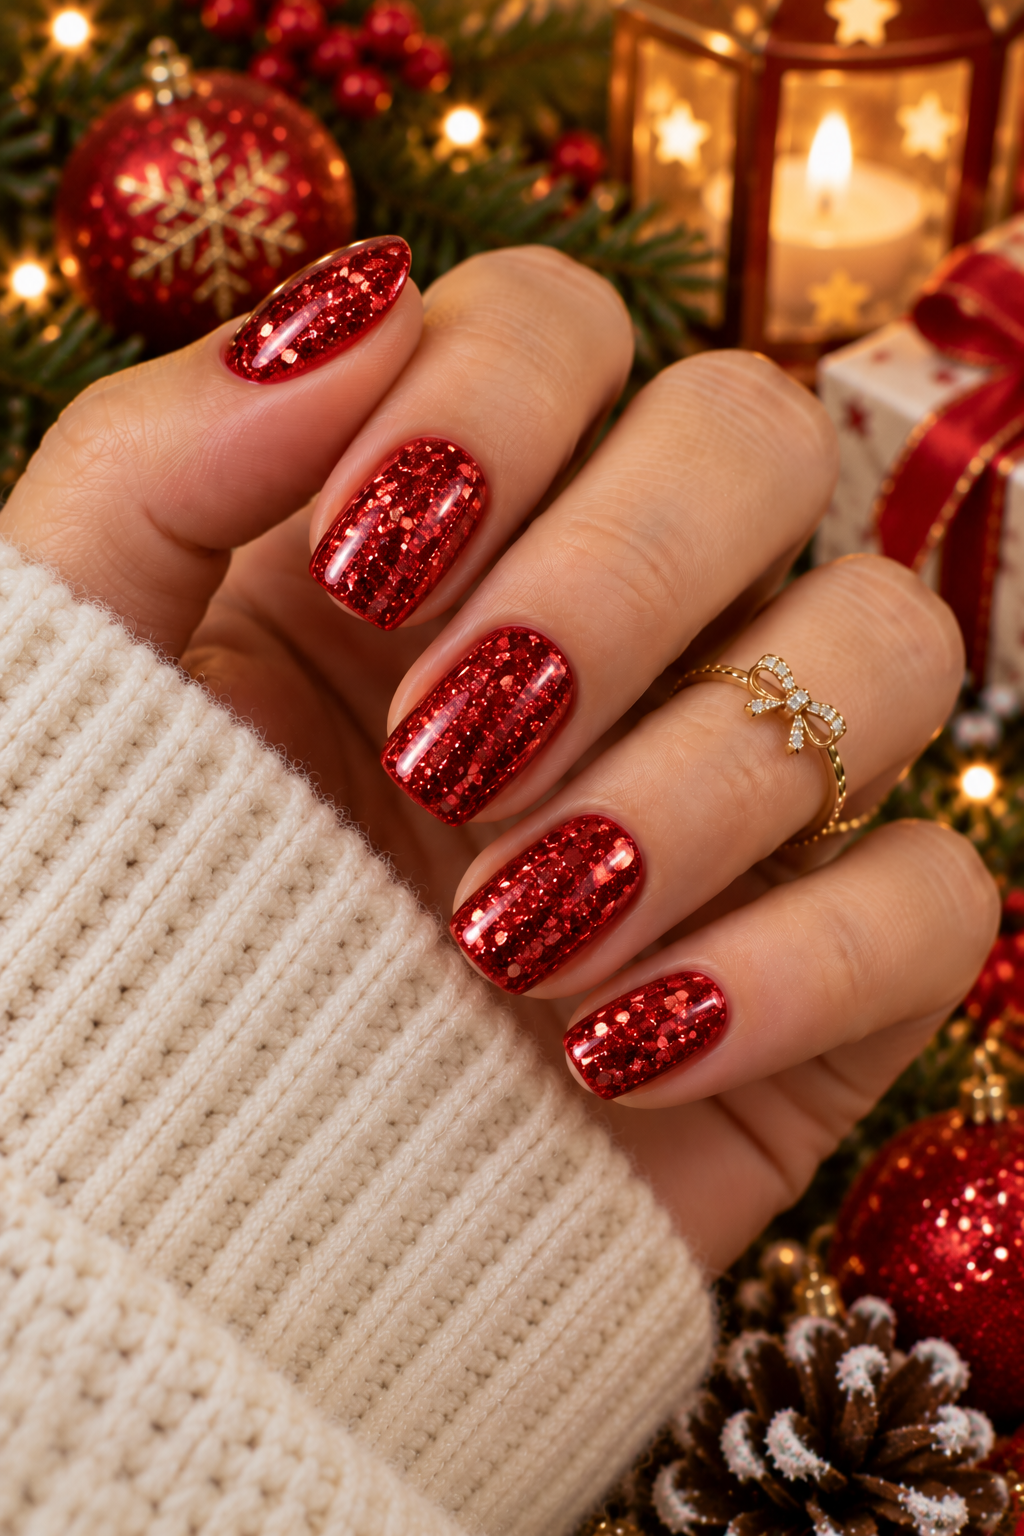
Sometimes, a little sparkle isn’t enough—and that’s where ruby red glitter comes in. Apply a red glitter polish over a matching red base, or use a clear glitter gel to place larger red flakes exactly where you want them. Two thin layers usually give a more even result than one thick coat. Smooth everything with a suitable top coat so the glitter feels less textured. The finished look is bold, bright, and wonderfully festive without needing any extra nail art.
14. Rhinestone Wreath Accent Nails
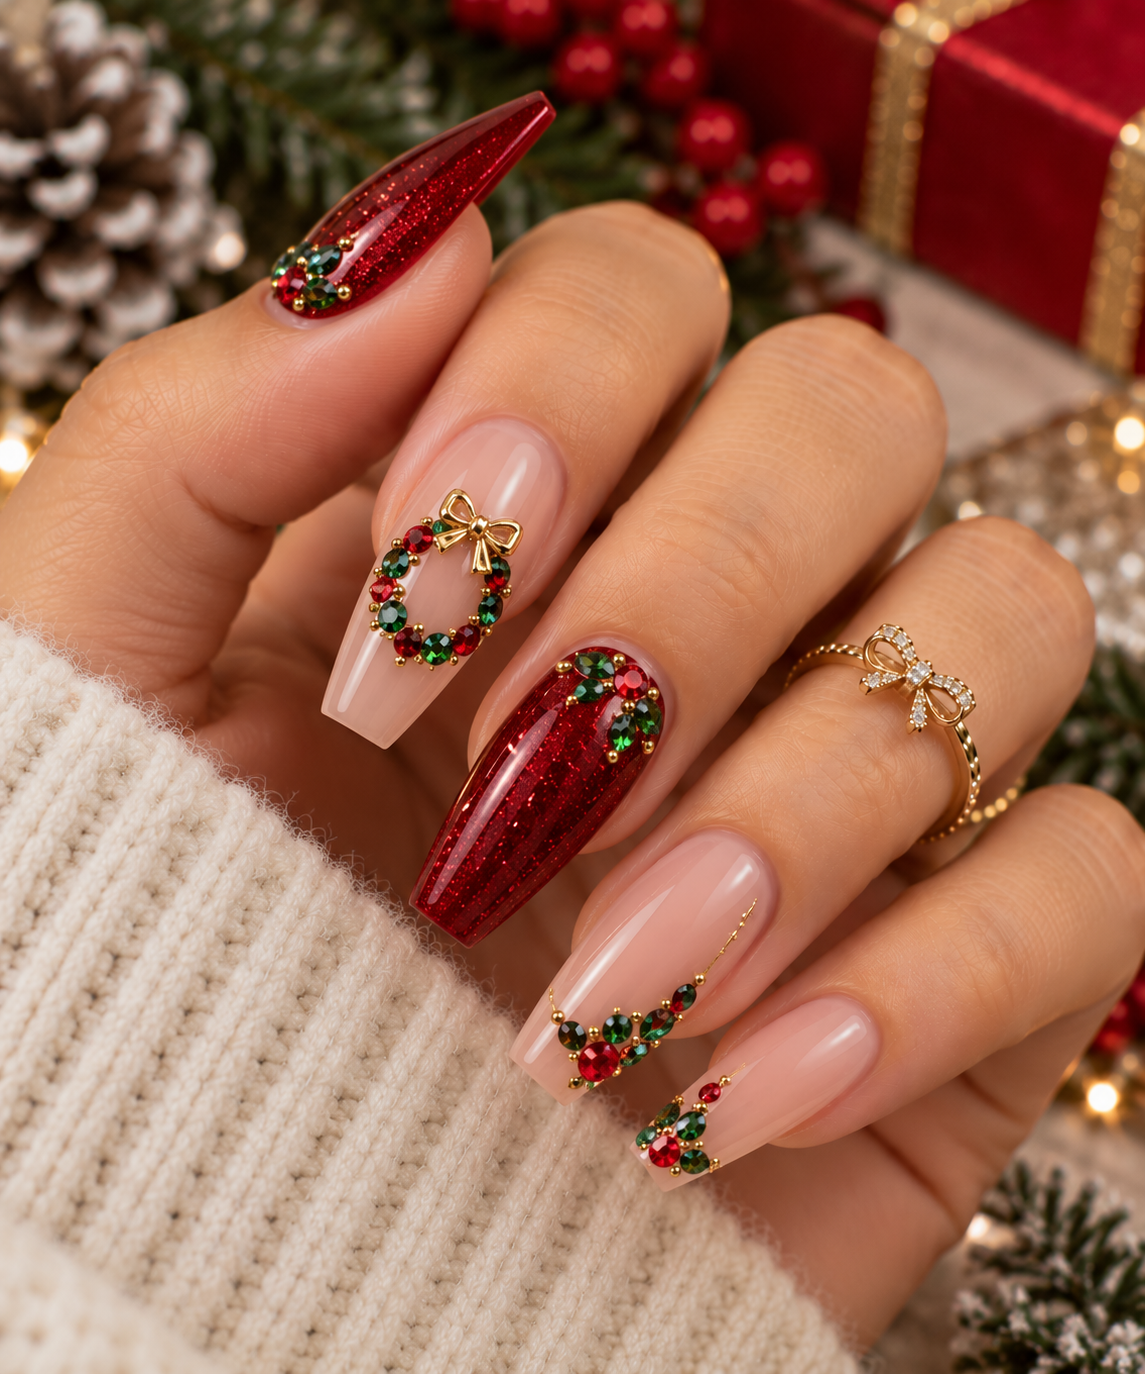
If you enjoy a little sparkle but want something more decorative than glitter polish, try a tiny rhinestone wreath. Start with a sheer nude or pale pink base, then arrange small green rhinestones in a circle on one accent nail. Add a couple of red stones to suggest berries, using nail gem adhesive or the method recommended for your manicure system. Keep the remaining nails simple so the wreath stays the star of the design. Secure the gems carefully to help them last.
15. Crystal Icicle Drip Nails
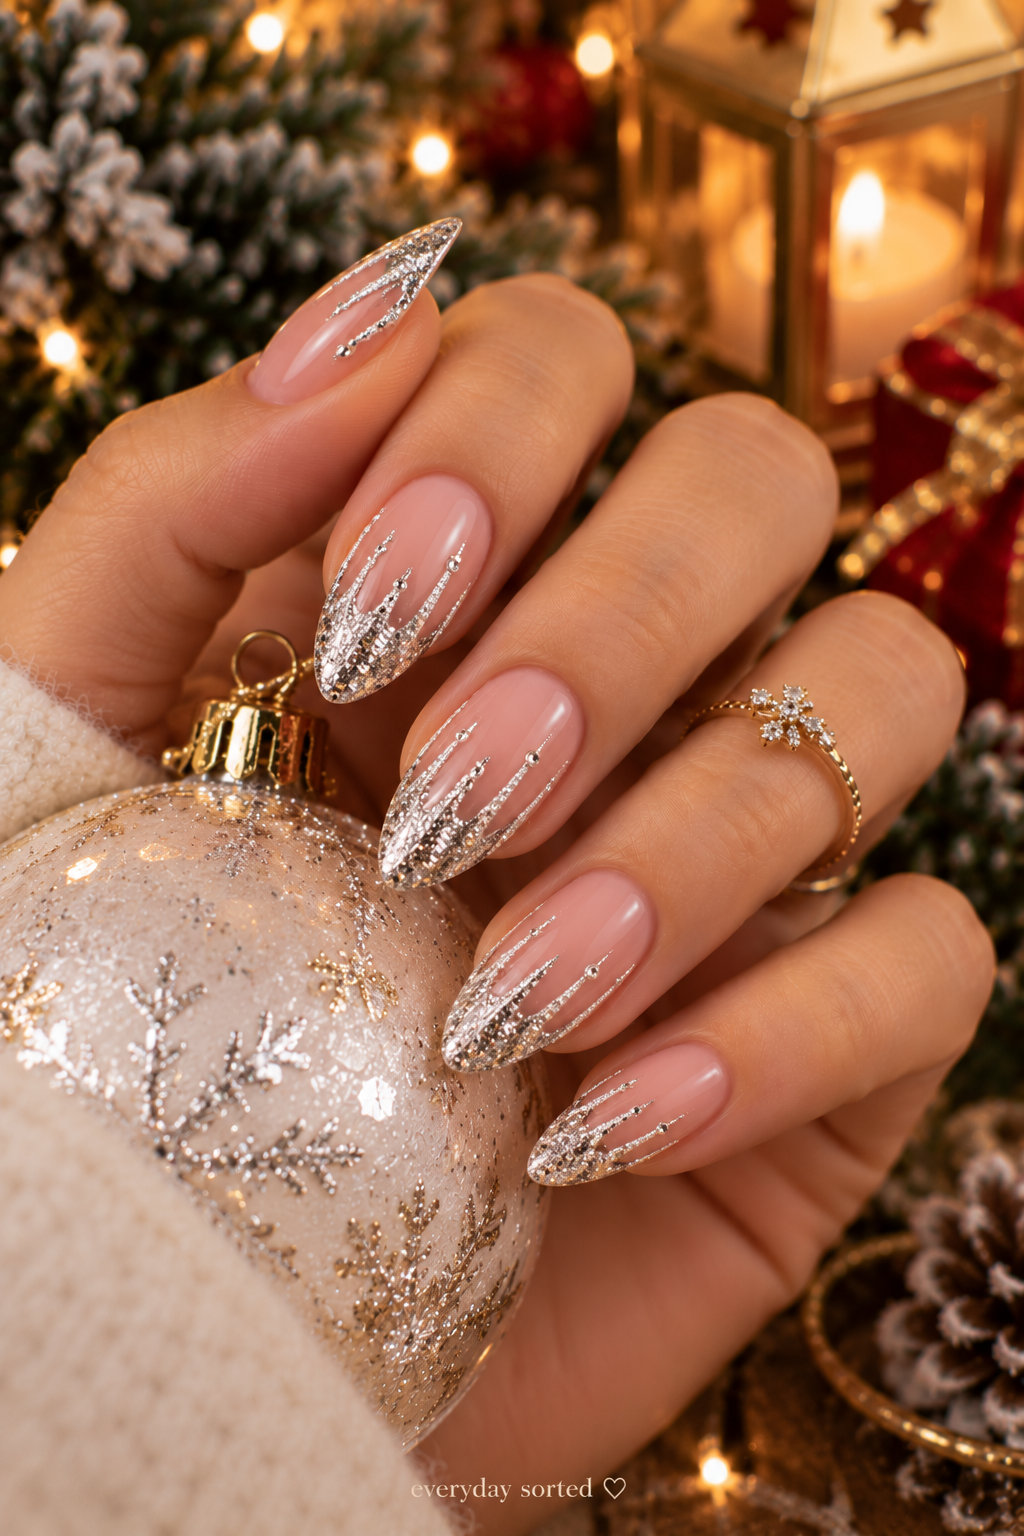
Icicle nails look especially pretty when the sparkle is concentrated near the tips. Apply a sheer milky or pale blue base, then use silver glitter polish or metallic gel to create thin drips descending from the tips. Vary the lengths slightly so they resemble real icicles rather than identical stripes. For extra dimension, add a touch of fine silver glitter near the ends. The translucent base keeps the overall effect light, while the reflective details give it that frosty winter finish.
16. Blinged-Out Festive French Nails
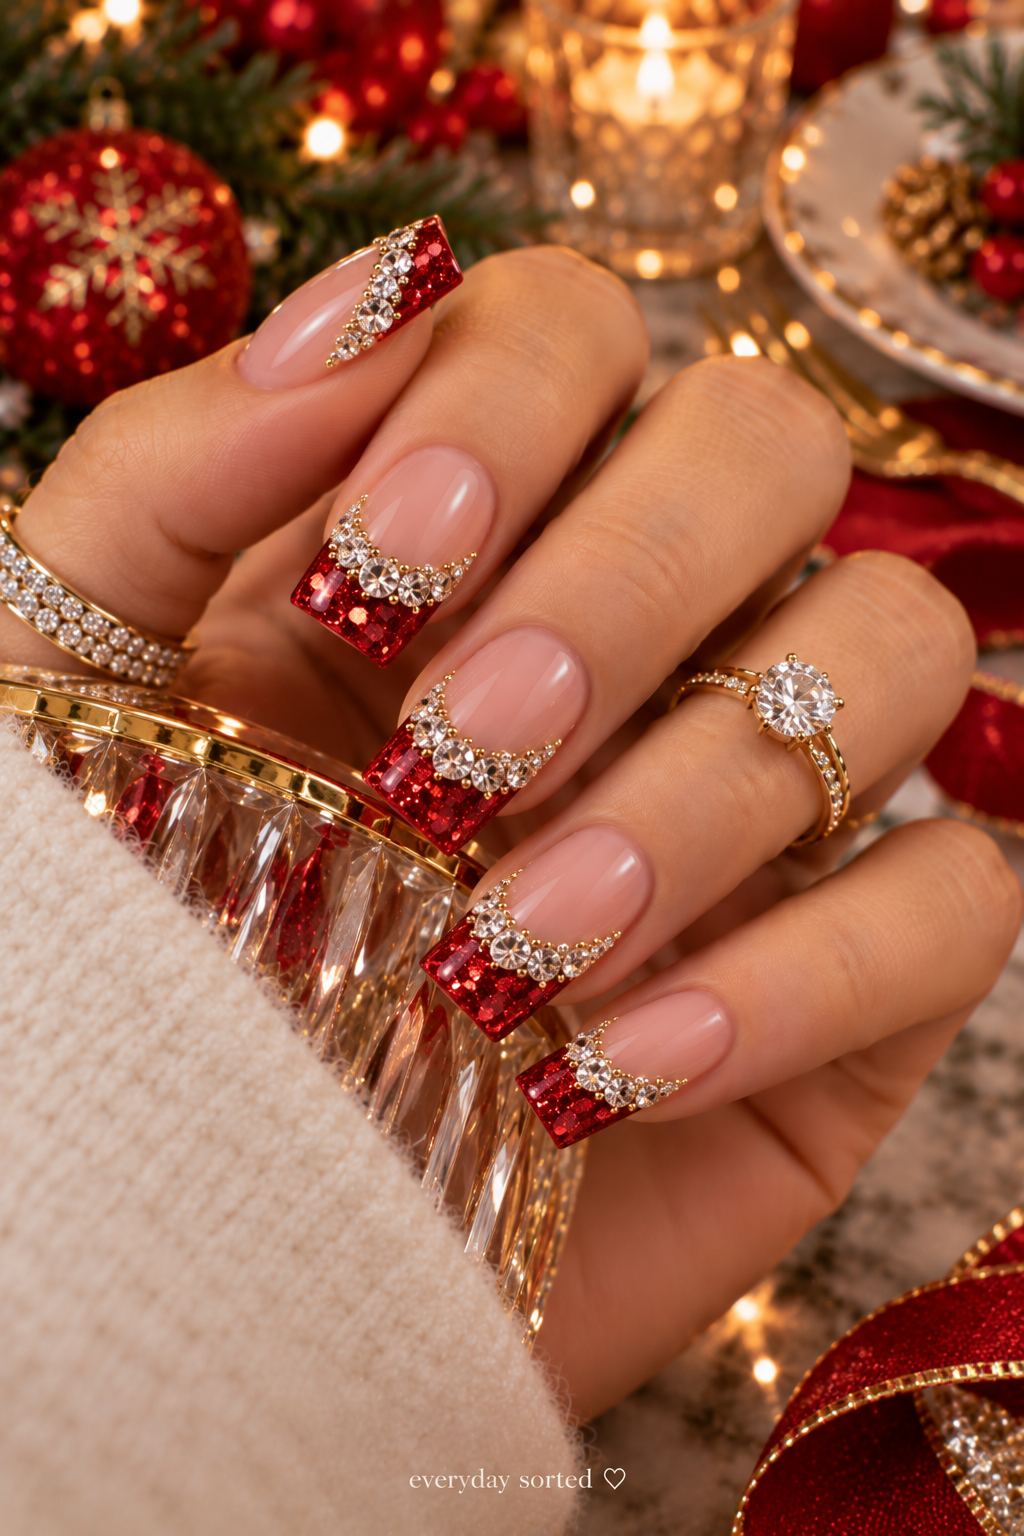
A French manicure can be just as festive as a full glitter set with a few well-placed details. Begin with your favorite sheer pink or nude base, then create thicker French tips using silver, gold, or champagne glitter polish. For a little extra sparkle, place tiny crystals along the smile line where the tip meets the base. You don’t need gems on every finger; using them on just one or two nails can make the whole manicure feel more balanced.
17. Champagne Bubble Fizz Nails
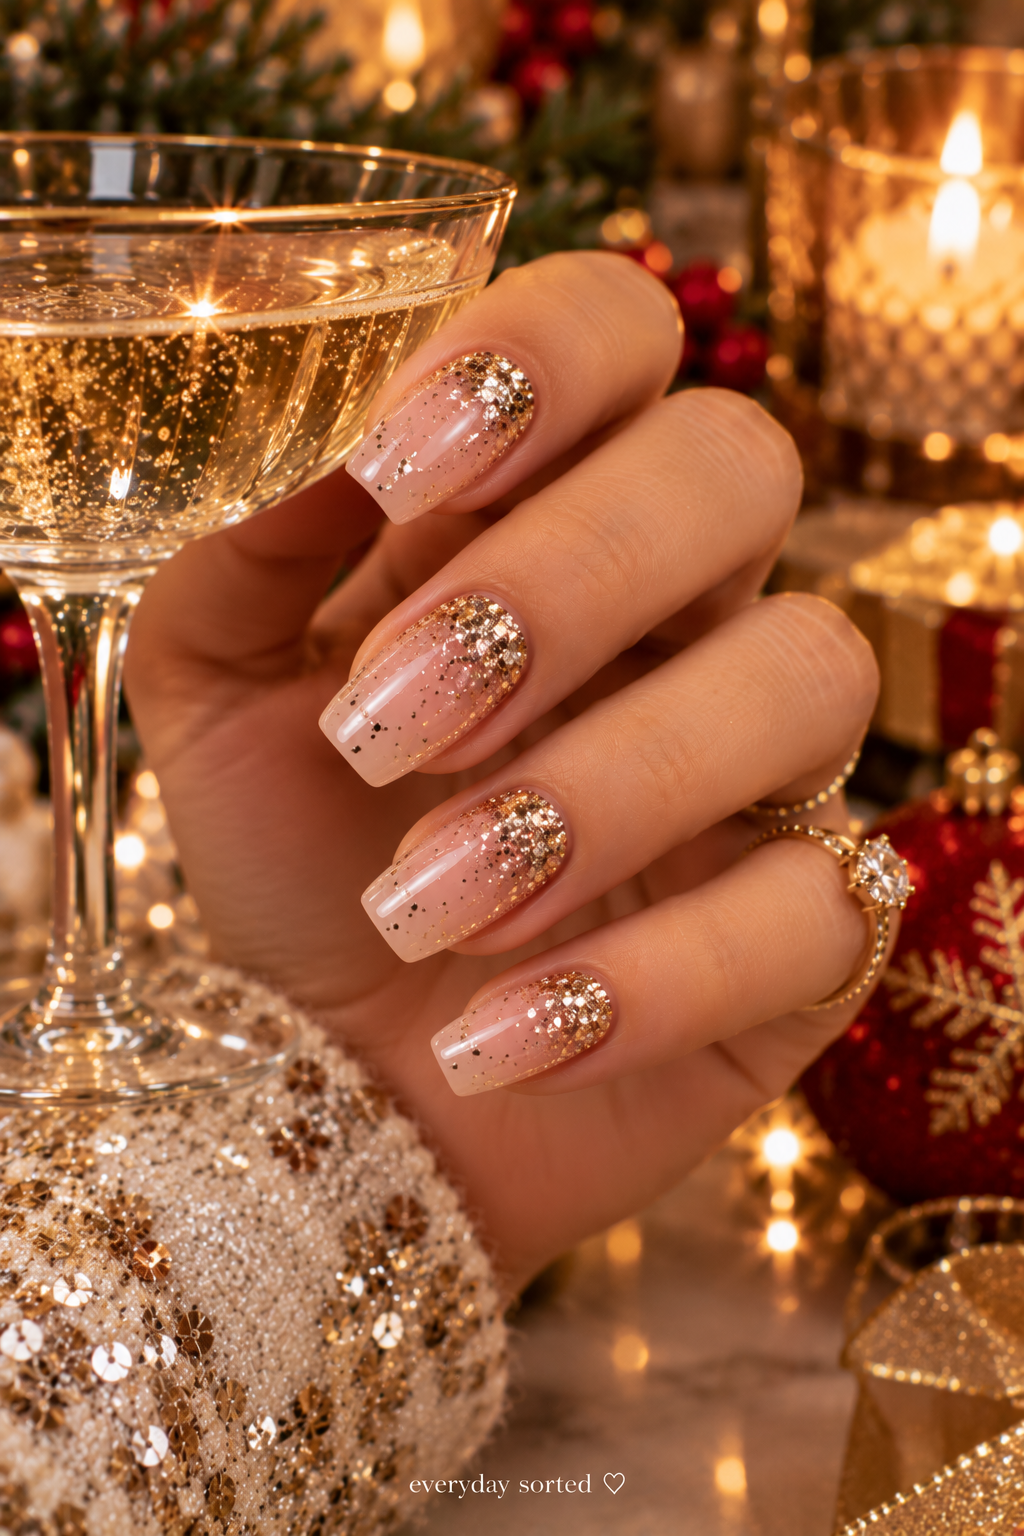
Champagne-inspired nails have a soft, sparkling effect that’s a little different from the usual Christmas glitter. Choose a nude, blush, or pale beige base, then concentrate fine champagne glitter around the cuticle area and gently fade it toward the middle of the nail. A sponge can help create a soft gradient without leaving a harsh line. Finish with a smooth top coat to blend everything together. The result should look like tiny bubbles catching the light rather than a solid layer of glitter.
18. Starry Aurora Borealis Nails
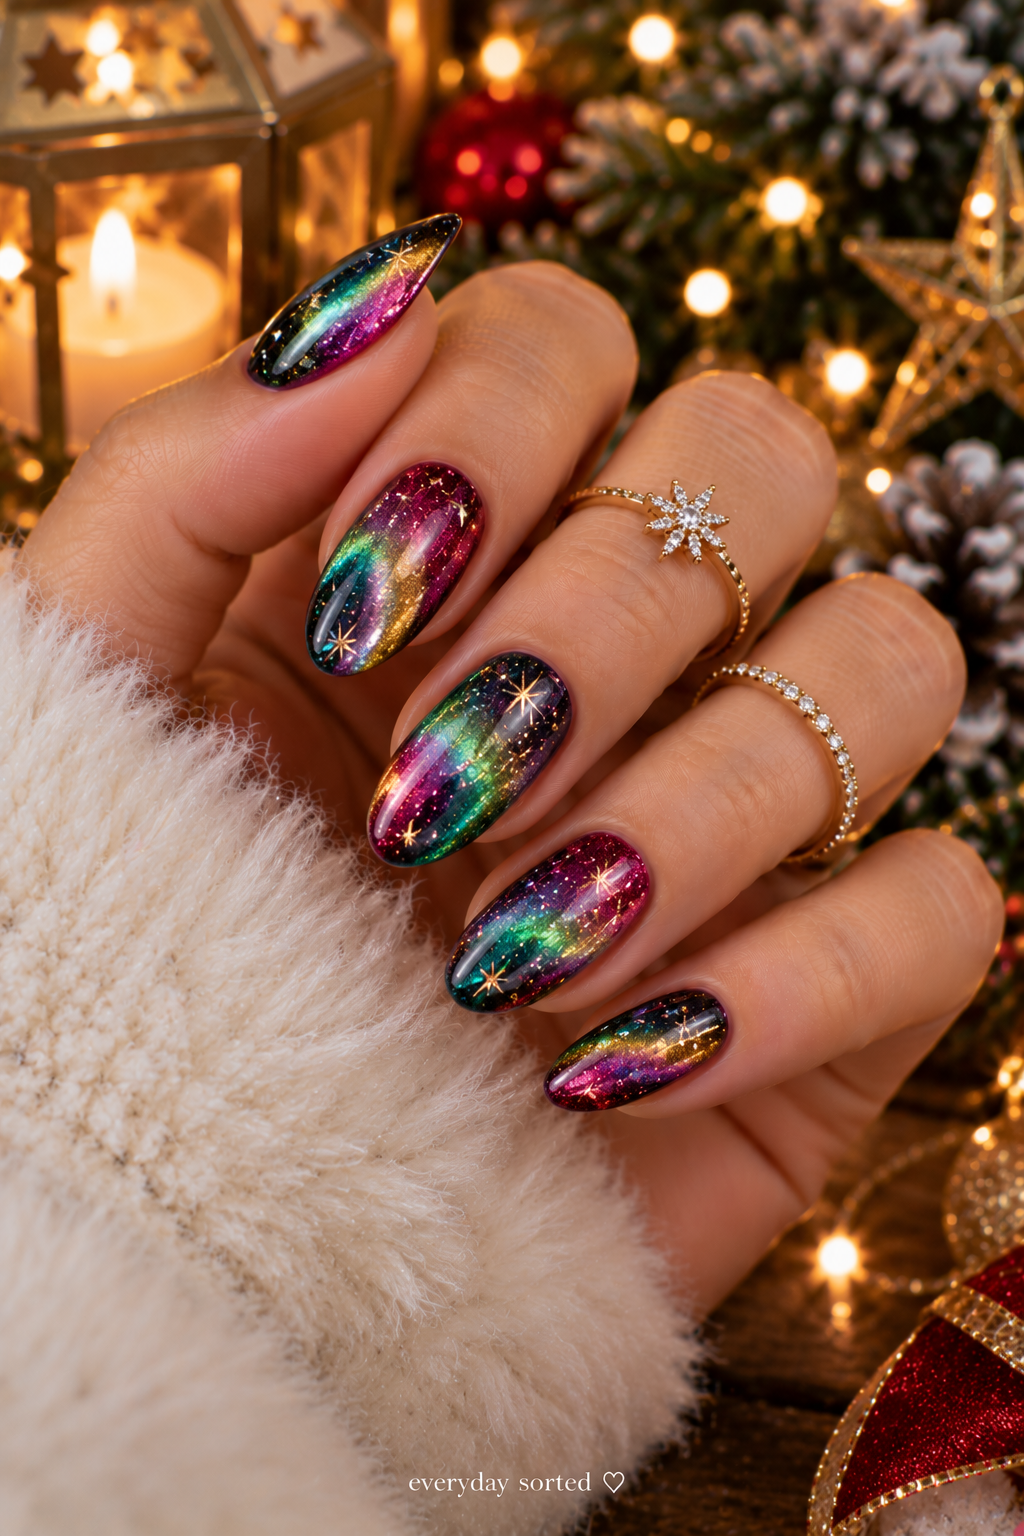
For something a little magical, take inspiration from the shifting colors of the northern lights. Start with a dark navy, black, or deep purple cat-eye base, then layer a multichrome magnetic polish over it if your product allows. Use a magnet to guide the shimmer into flowing bands of green, blue, and violet, following the product instructions for the best effect. Each nail can catch the light differently, so there’s no need to make the patterns identical. That’s part of the charm.
19. 3D Cable Knit Sweater Nails
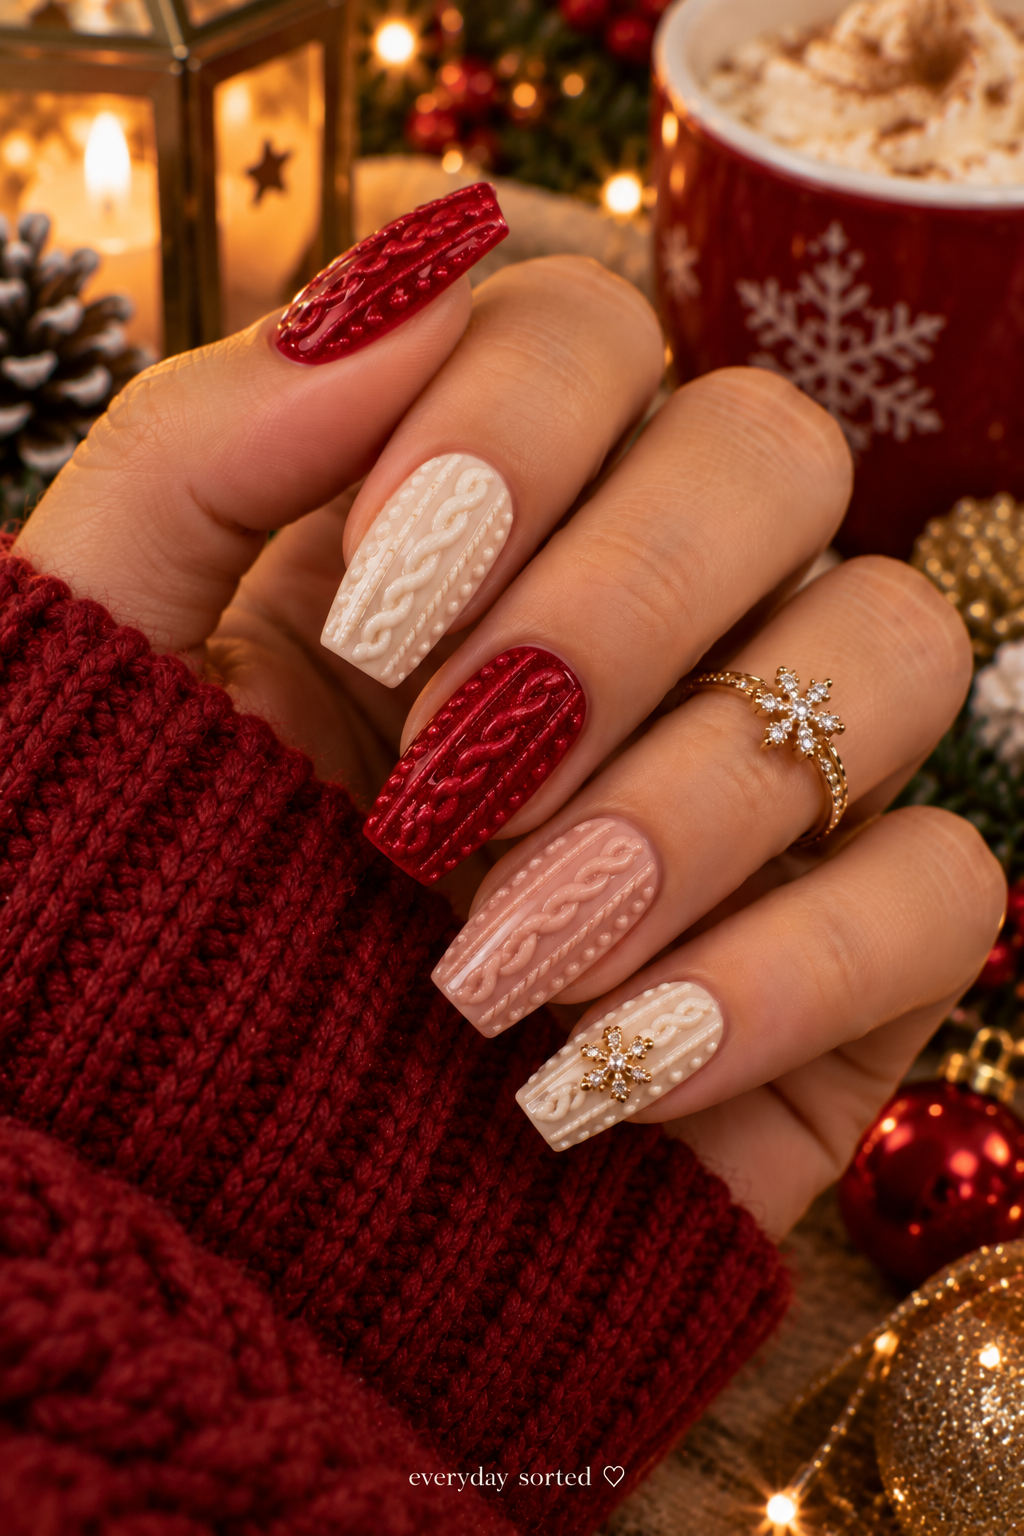
Sweater nails bring a cozy texture to your manicure, almost like tiny knitted patterns on your fingertips. Apply a base color such as cream, dusty pink, or soft red, then use a thick builder gel or textured nail art gel to draw raised lines in cable-knit patterns. Cure the gel according to its instructions, repeating the process if more height is needed. A matte top coat can enhance the wool-like appearance, although the right finish depends on the gel system you’re using.
More to Read:
1: The Ultimate Fall Beauty Routine: 25 Simple Changes to Make This Season
20. Green Flannel Checkerboard Nails
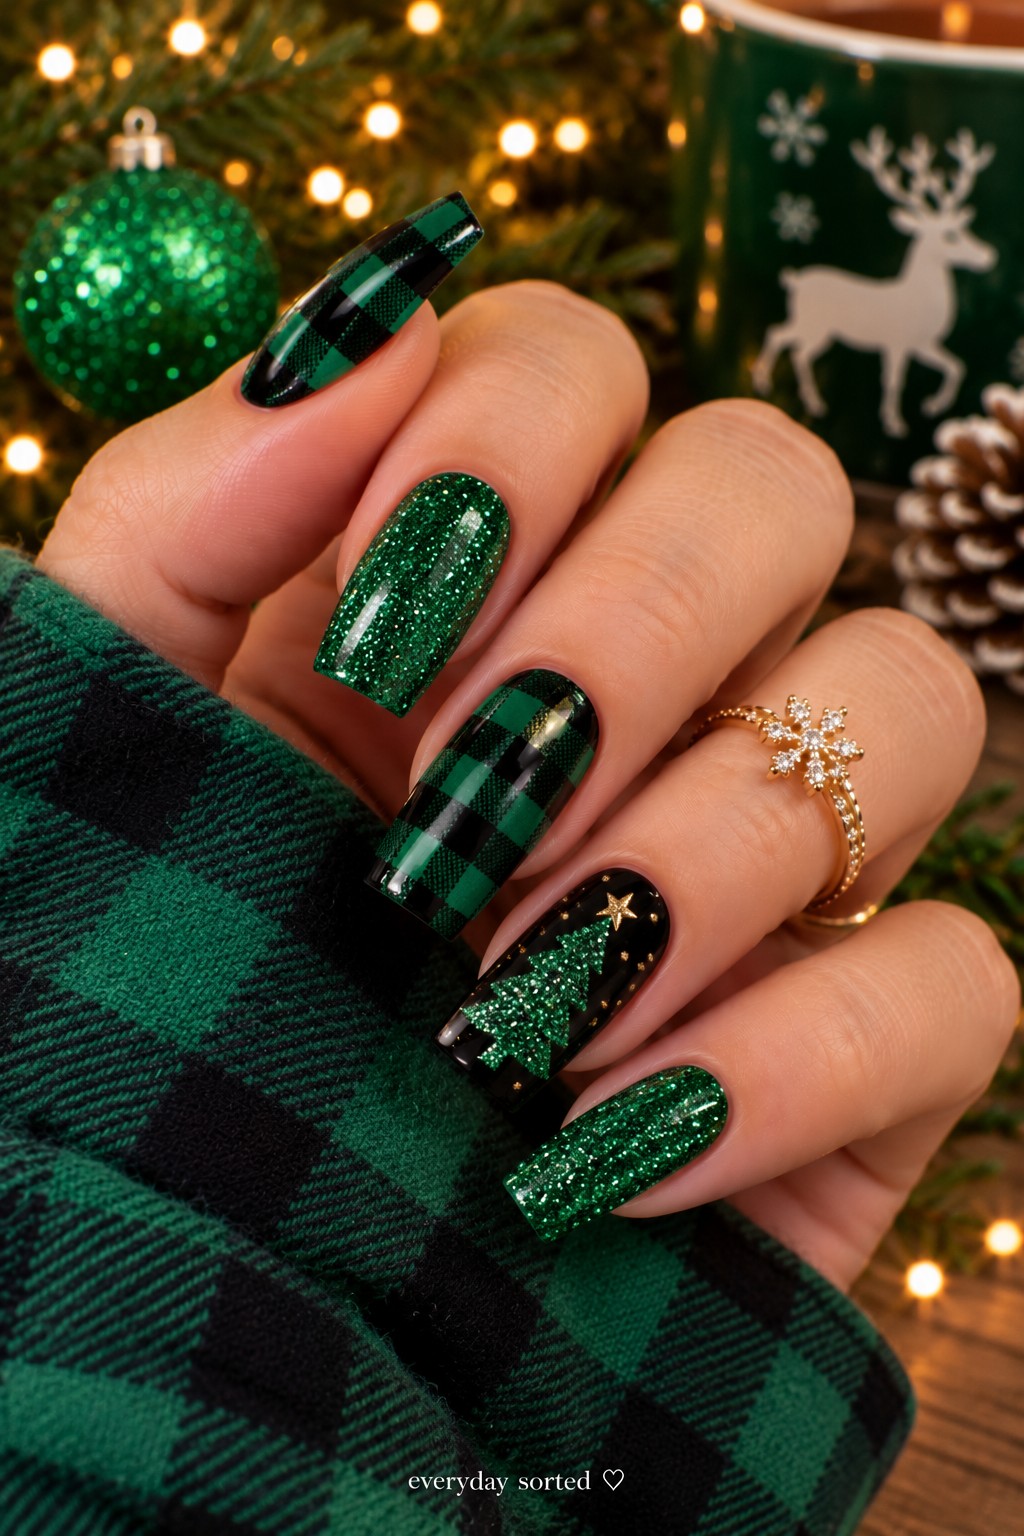
A forest-green checkerboard pattern feels festive without being too literal. Paint your nails a light cream or pale green base, then use a fine brush to draw a grid of squares. Fill alternating sections with forest green and black or dark green, working slowly so the lines stay neat. You can also create the pattern on just one or two accent nails if painting every square feels tricky. A glossy top coat helps the colors look richer and gives the design a clean finish.
21. Frosted Windowpane Nails
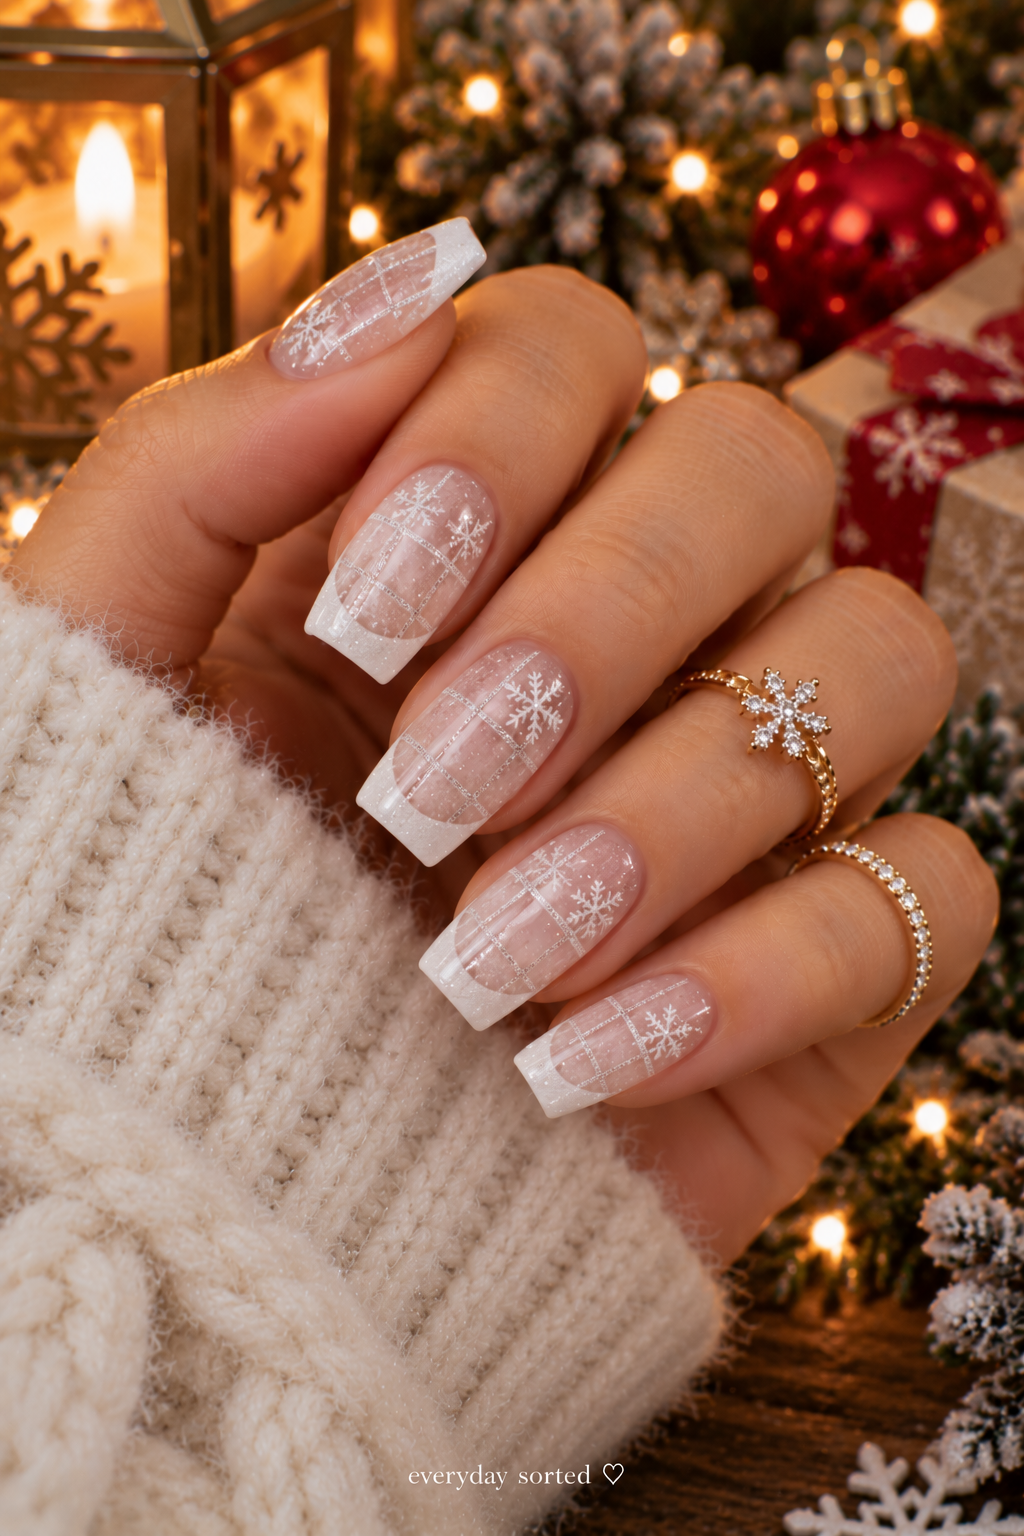
Imagine the delicate lines you see on a frosted winter window—that’s the feeling this manicure captures. Apply a translucent milky white or pale gray base and let it dry. Use a fine brush with a slightly more opaque white polish to draw thin horizontal and vertical lines across each nail, creating a simple windowpane pattern. A matte top coat softens the overall effect and makes the design look misty rather than sharply graphic. Don’t worry about perfect symmetry; a light touch works beautifully here.
22. Velvet Cranberry Nails
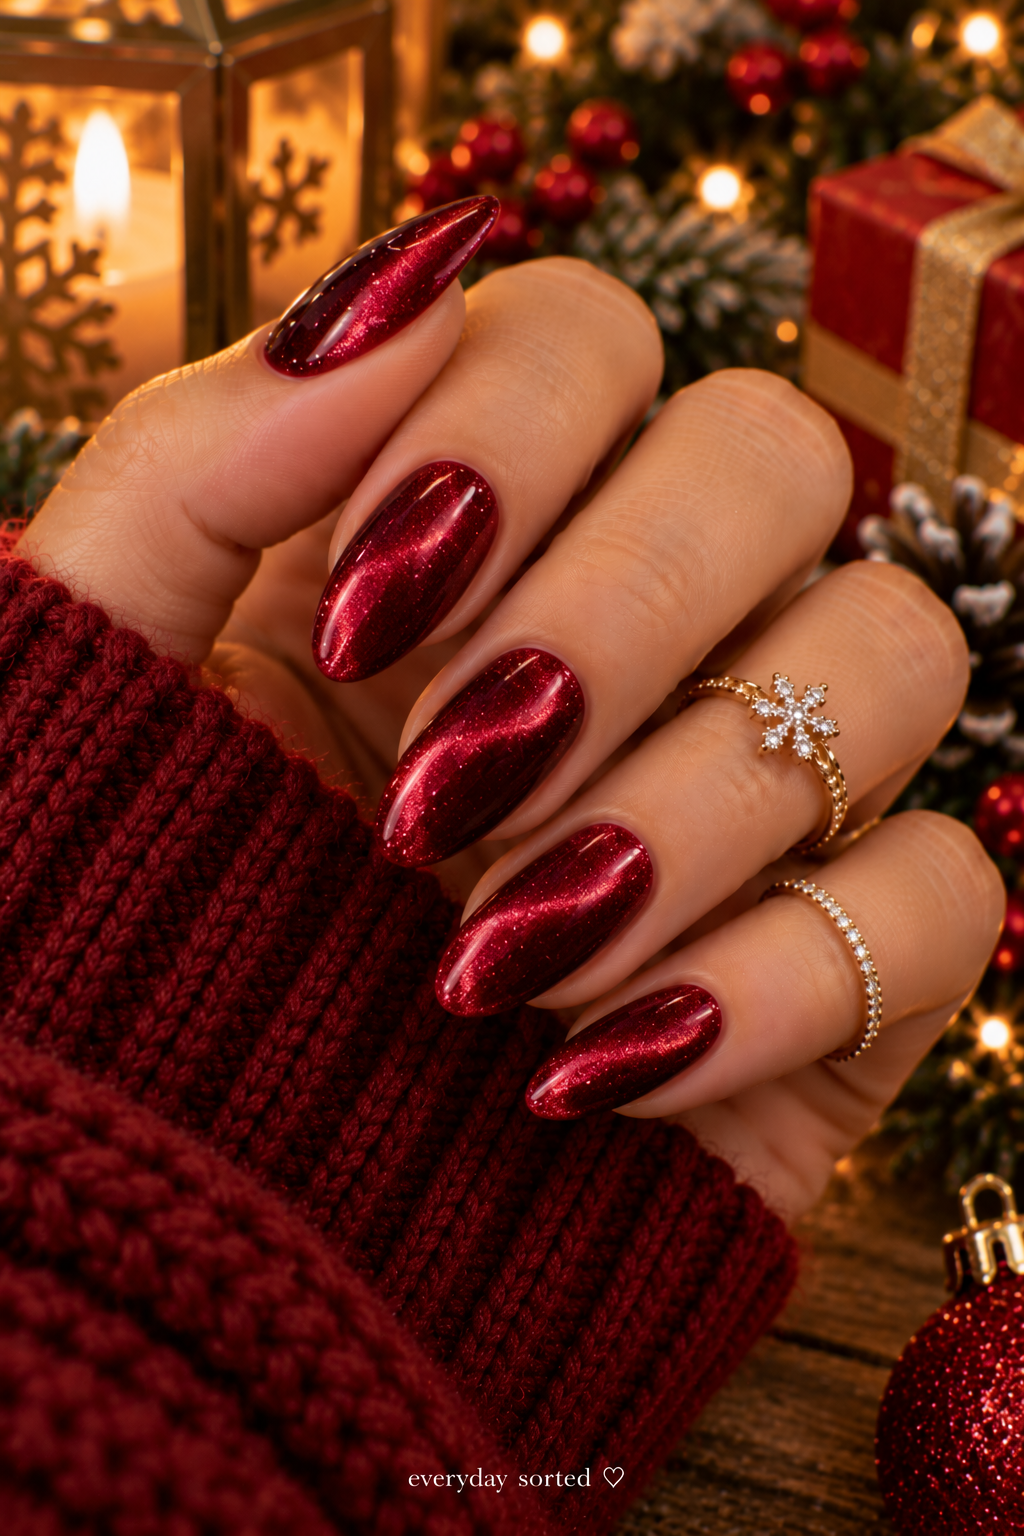
Cranberry is a lovely alternative to bright Christmas red, especially when you want a deeper, moodier shade. Apply a cranberry-colored magnetic polish and use the magnet to bring its shimmer to the surface, following the product’s curing instructions. Depending on the polish, the light may gather into a soft stripe or spread into a plush, velvet-like glow. You can leave the nails plain and let the finish do the work. There’s no need for extra decorations when the color itself is this rich.
23. Cozy Cocoa Swirl Nails
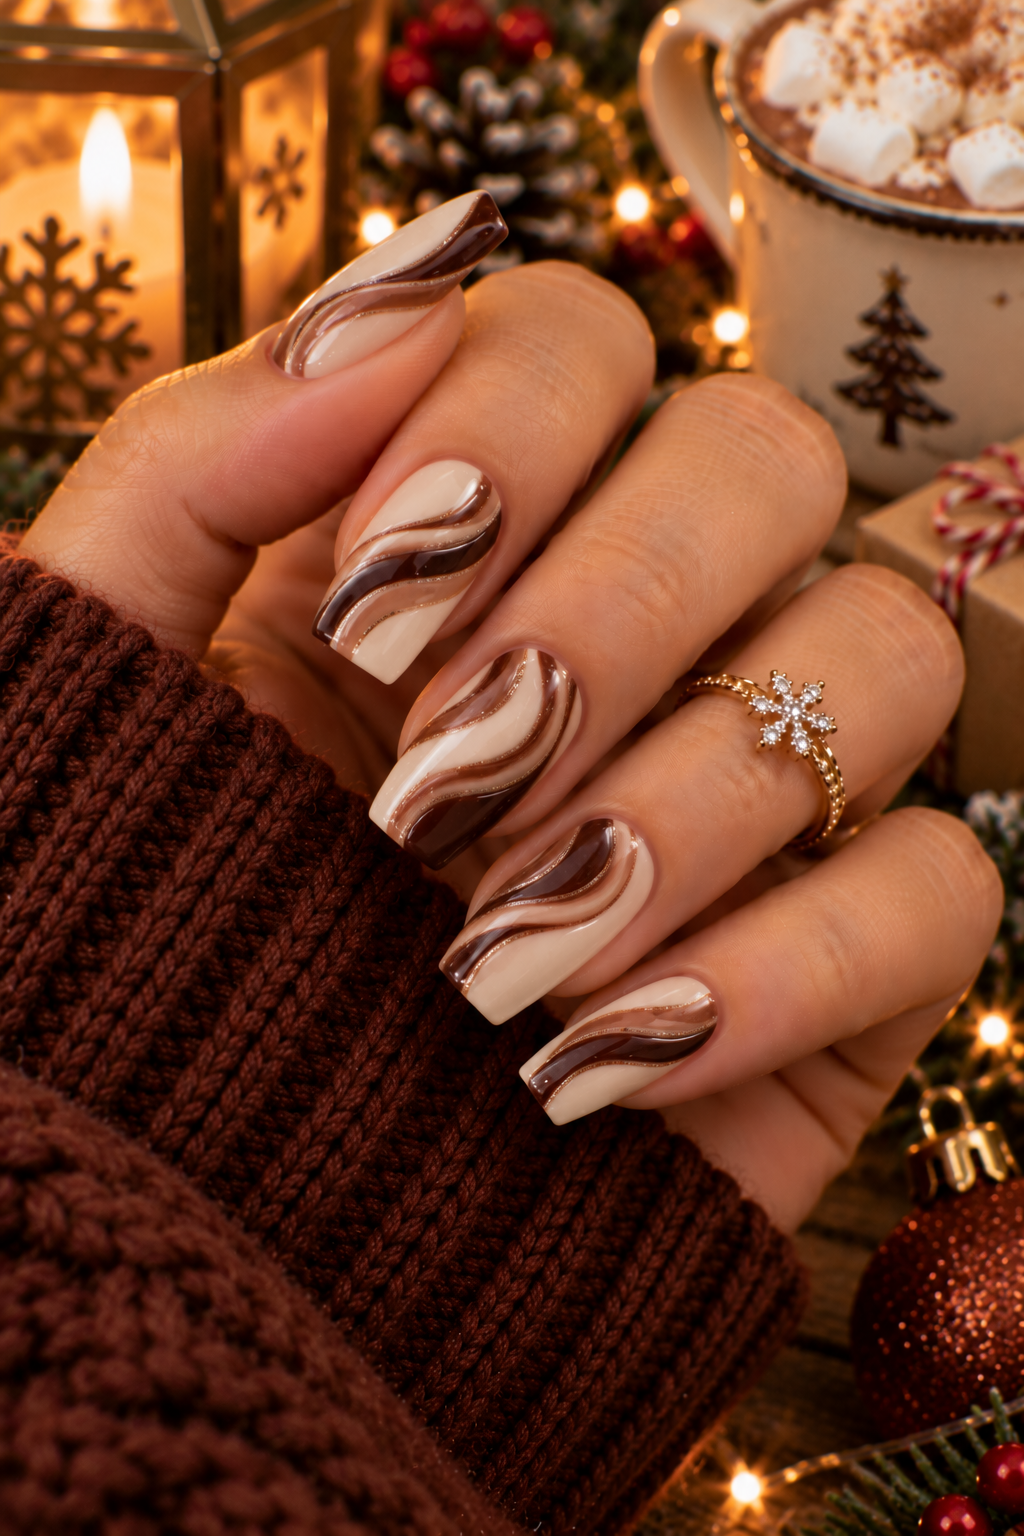
Cream and chocolate brown make a delicious-looking combination for nail art. Start with a warm ivory or milky beige base, then use a fine liner brush to paint curved brown lines across the nails. Let the swirls bend and overlap naturally instead of trying to make every pattern identical. If you prefer a simpler manicure, keep the design to two accent nails and leave the others in a solid cocoa shade. A glossy top coat gives the brown lines a smooth, almost chocolate-like finish.
24. Rudolph the Reindeer Nails
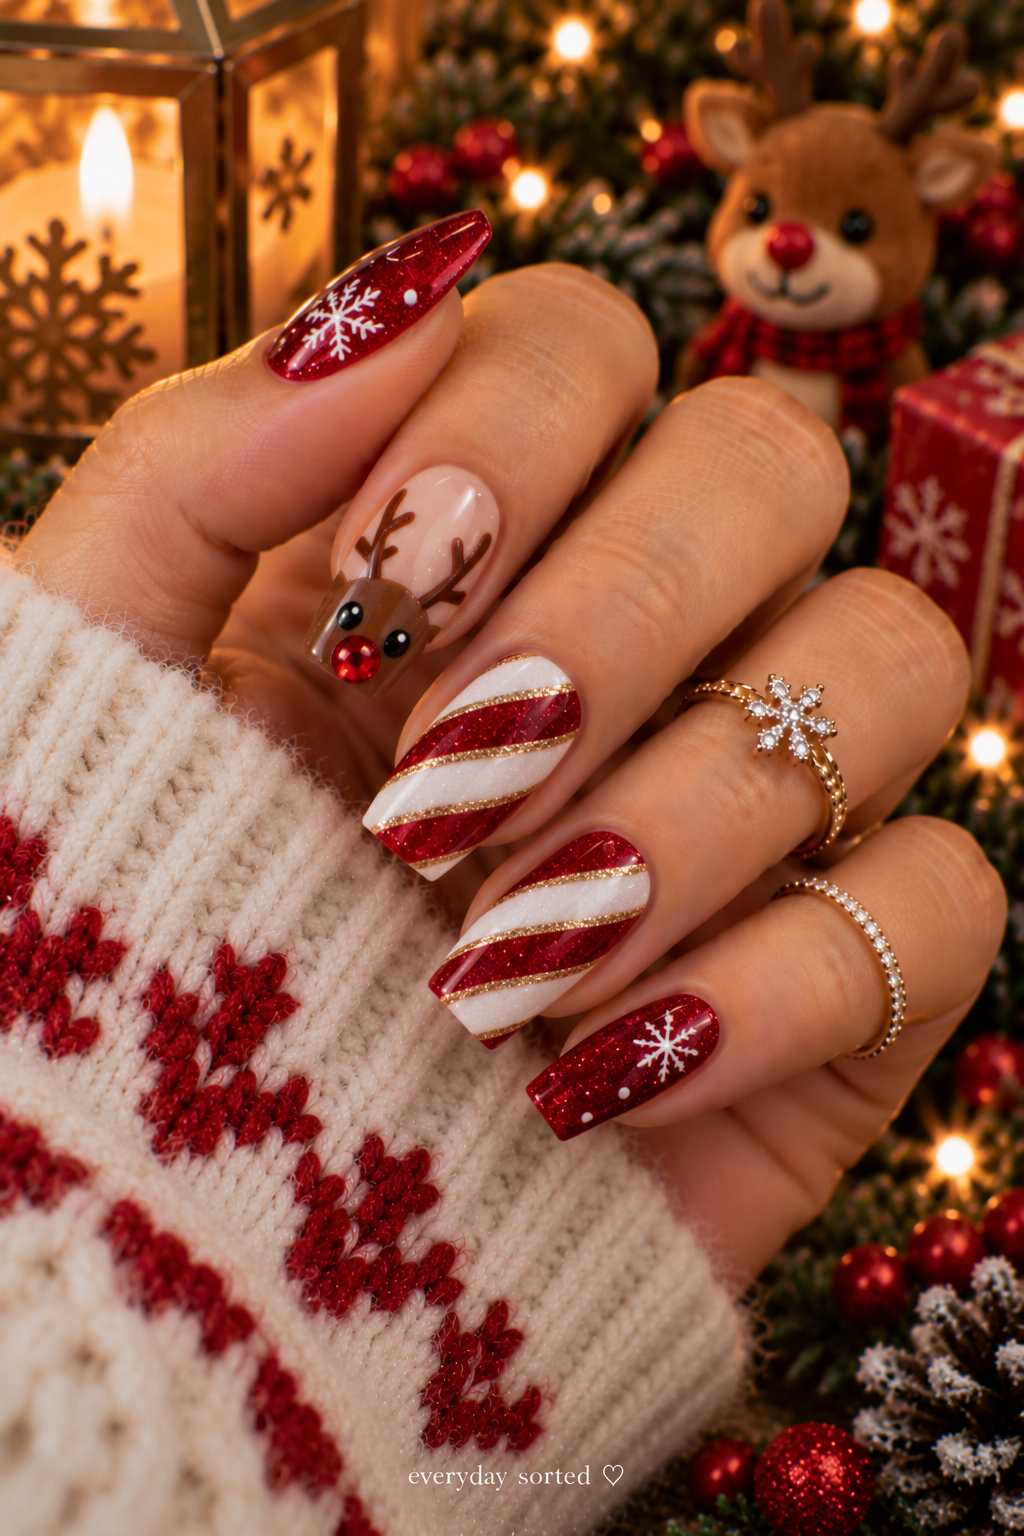
Rudolph nails are a fun way to bring a little character into your Christmas manicure. Use a nude or light brown base, then paint a rounded reindeer face on one accent nail with a slightly darker brown polish. Add small black eyes, a few simple antlers, and a bright red nose using a dotting tool. Take your time with the facial details; even a very simple expression can give the design plenty of personality. Keep the other nails in a coordinating brown or cream shade.
25. Dancing Nutcracker Nails
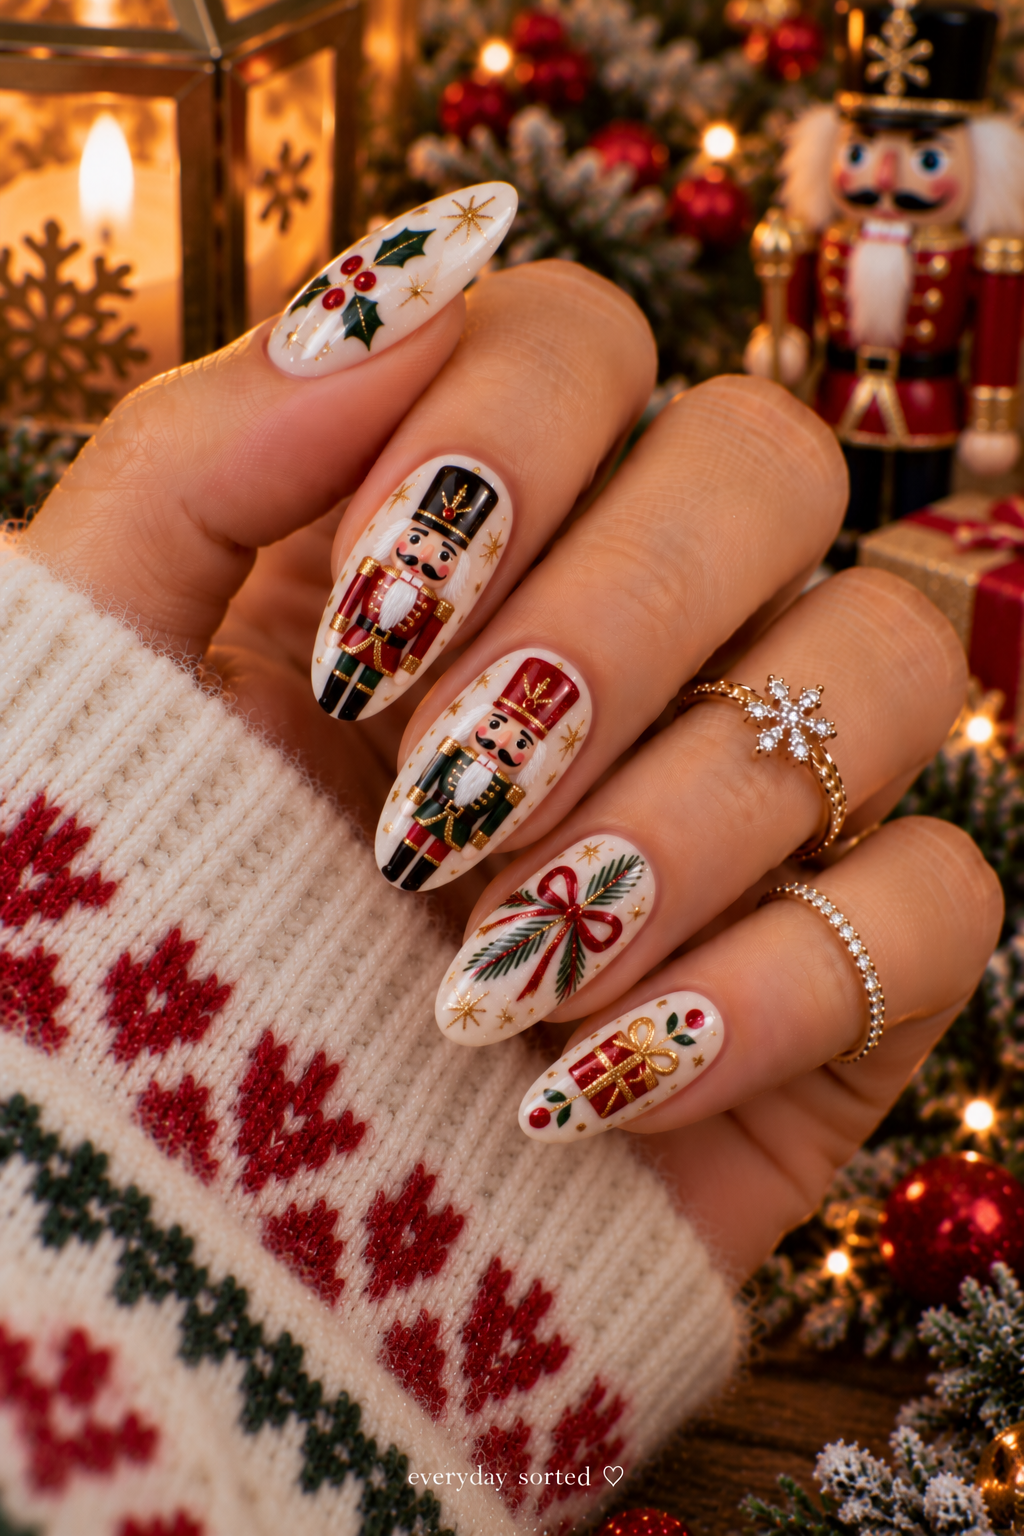
Nutcracker nail art is all about the tiny details, so a little patience goes a long way. Begin with a white or pale cream base, then paint miniature soldier shapes using red, blue, black, and gold nail art paints. A fine brush helps with the hats, jackets, and small facial features, but you can simplify the figures if you’re new to detailed nail art. Try placing one nutcracker on each accent nail rather than squeezing a full character onto every finger. The result feels playful and wonderfully nostalgic.
26. Melting Snowman Nails
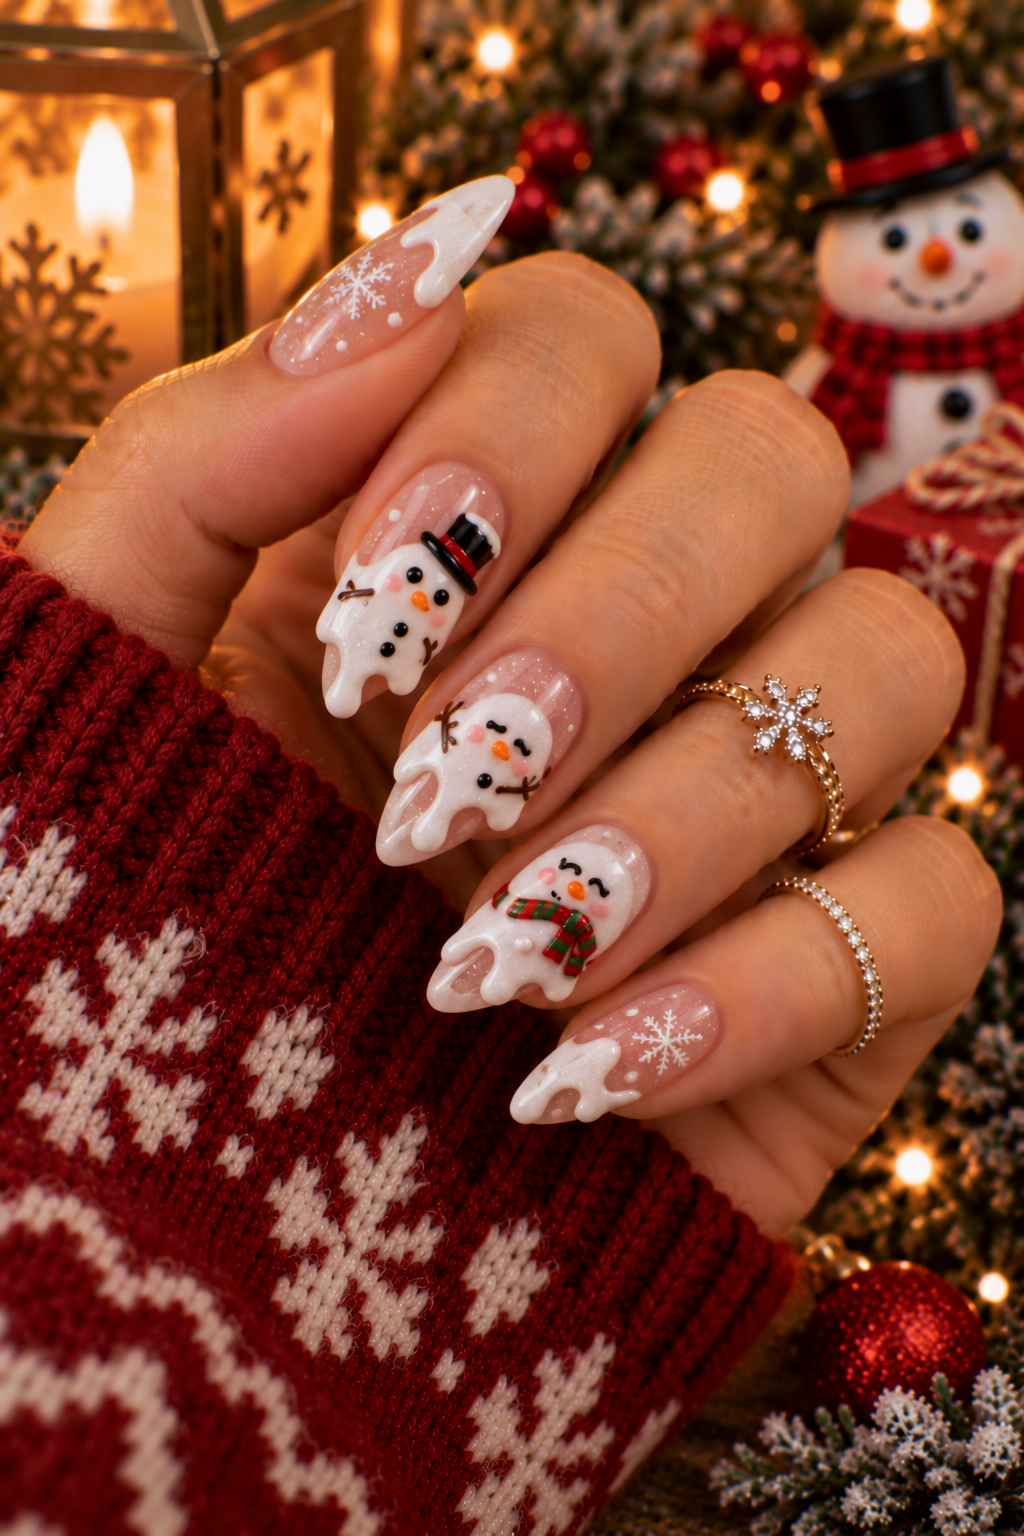
For a snowman design with a playful twist, try making the snow look as though it’s melting over the tips. Start with a pale blue or sheer nude base, then use white gel polish to paint rounded drips descending from the free edge of the nail. Add tiny black dots for eyes and buttons, plus a small orange carrot nose on an accent nail. Keep the drips rounded rather than perfectly straight so the snowman looks soft and cartoon-like. Cure the gel as directed and seal the design with a suitable top coat.
27. Candy Cane Lane Nails
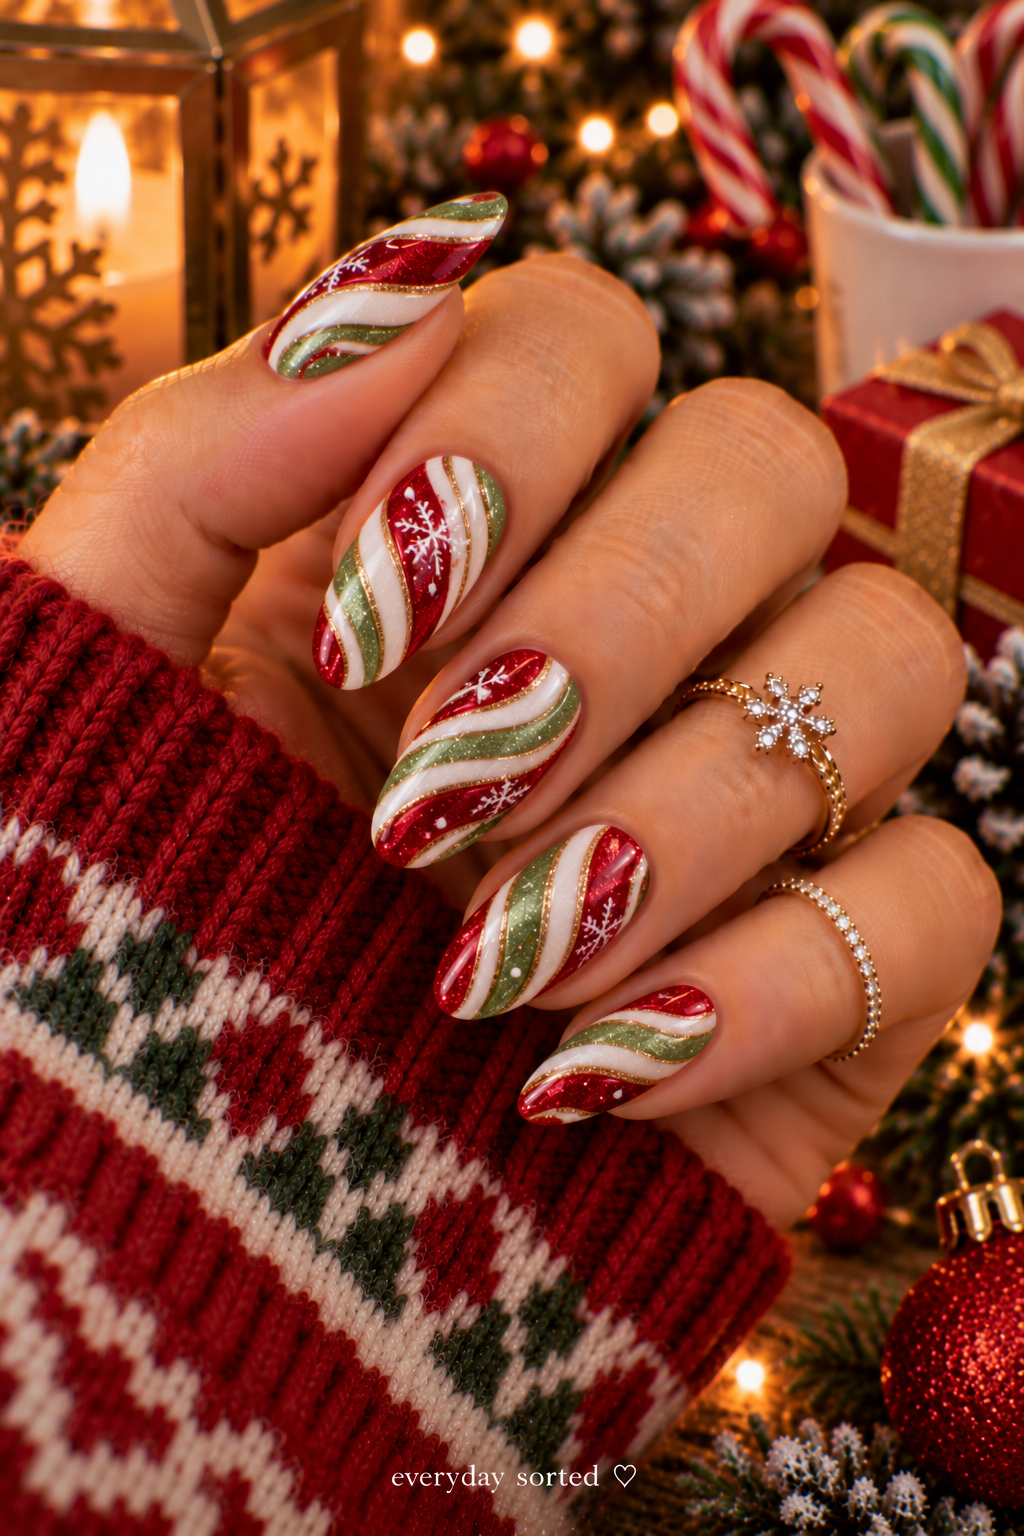
If one candy cane nail isn’t enough, this version turns the whole manicure into a festive stripe party. Choose red, white, and light green polishes, then alternate the colors across your nails or use different stripe combinations on each finger. A striping brush helps create clean lines, while nail art tape can make the process easier if you’re working with regular polish. Allow each color to dry before adding the next. Mixing up the patterns slightly keeps the set interesting without making it feel too chaotic.
28. Jingle Bell Dangle Nails
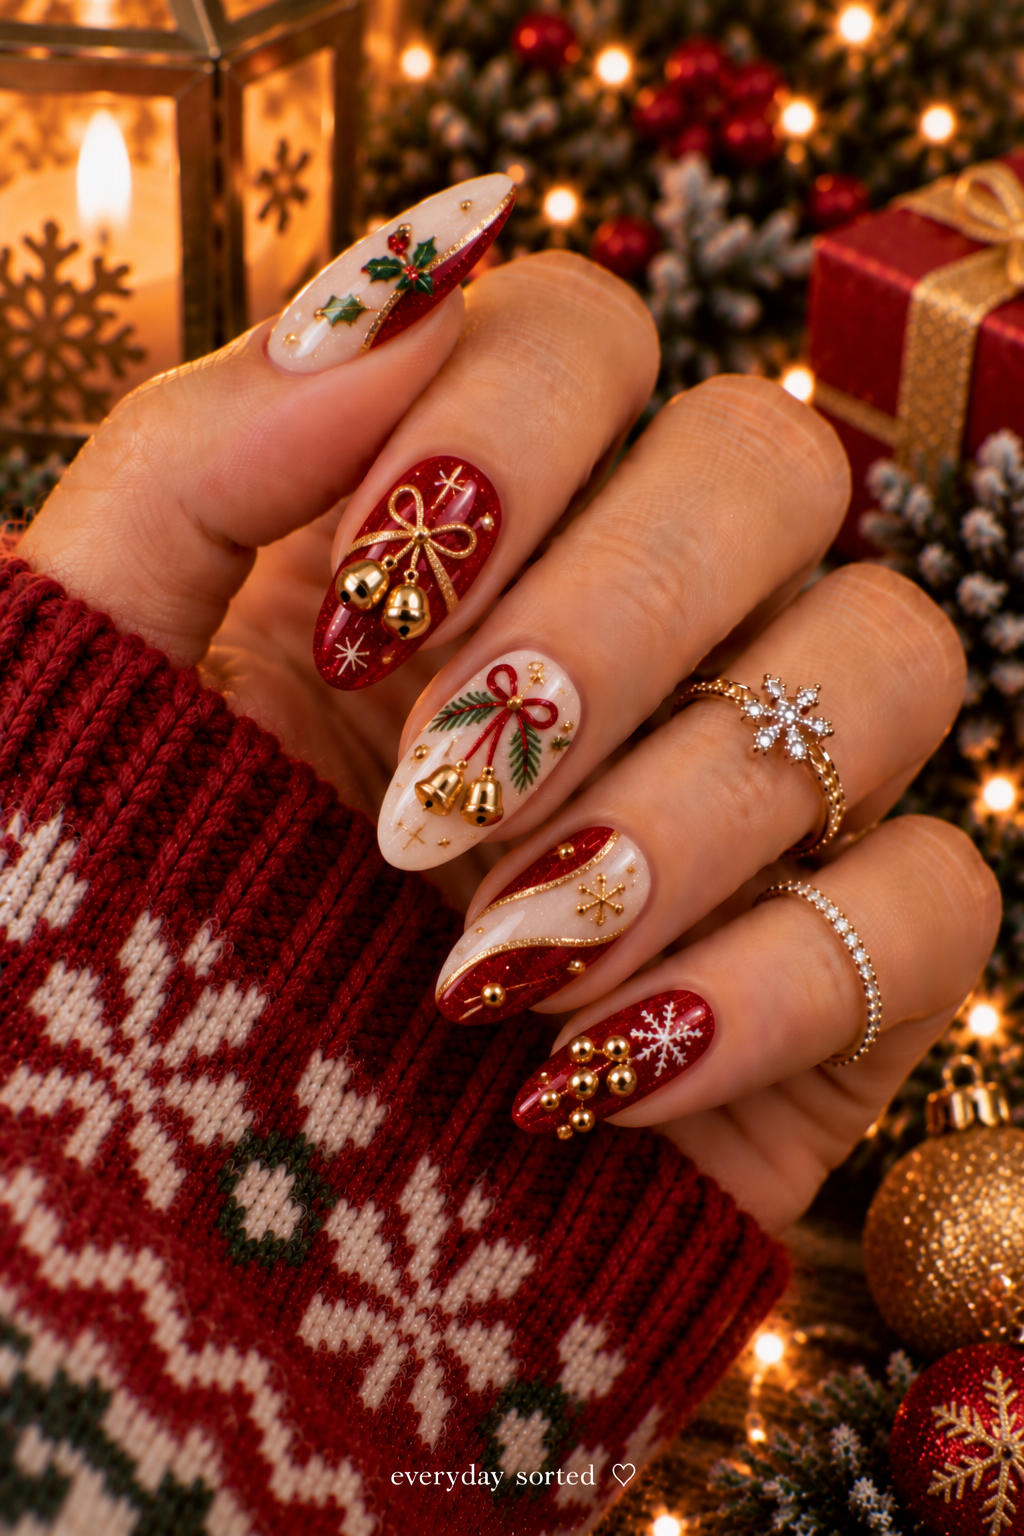
Gold details can make even a simple manicure feel ready for Christmas. Apply a deep red, green, or neutral base, then use gold metallic polish to paint small clusters of dots that resemble tiny jingle bells. For a more dimensional look, add small gold nail charms to one or two accent nails, securing them with suitable nail adhesive. Keep the bell details close together so they read as a little cluster rather than random dots. A carefully applied top coat can help protect the painted design.
29. Holly Jolly Text Nails
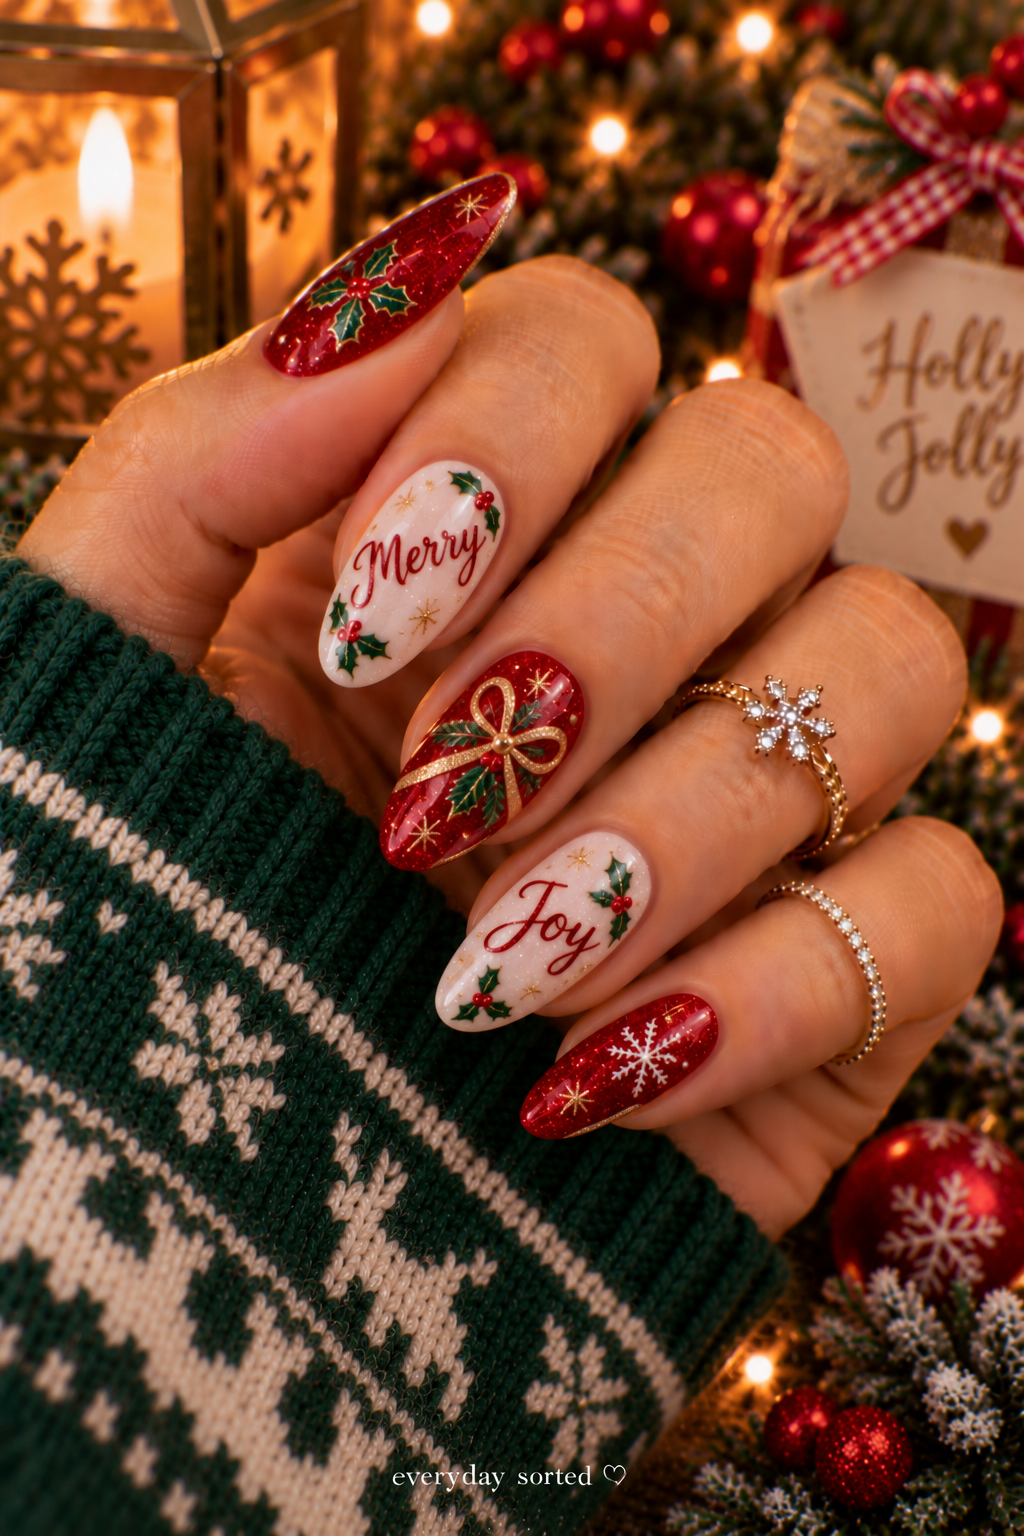
Sometimes, a single word says everything you want your Christmas manicure to say. Start with a smooth white, nude, or pale pink base, then use an ultra-fine brush to paint a tiny word such as “Merry” or “Joy” on one or two nails. Metallic gold or deep red works especially well against a light background. If freehand lettering feels tricky, nail art decals are a perfectly good alternative. Keep the surrounding nails simple so the lettering remains easy to see.
30. Festive Dino Nails
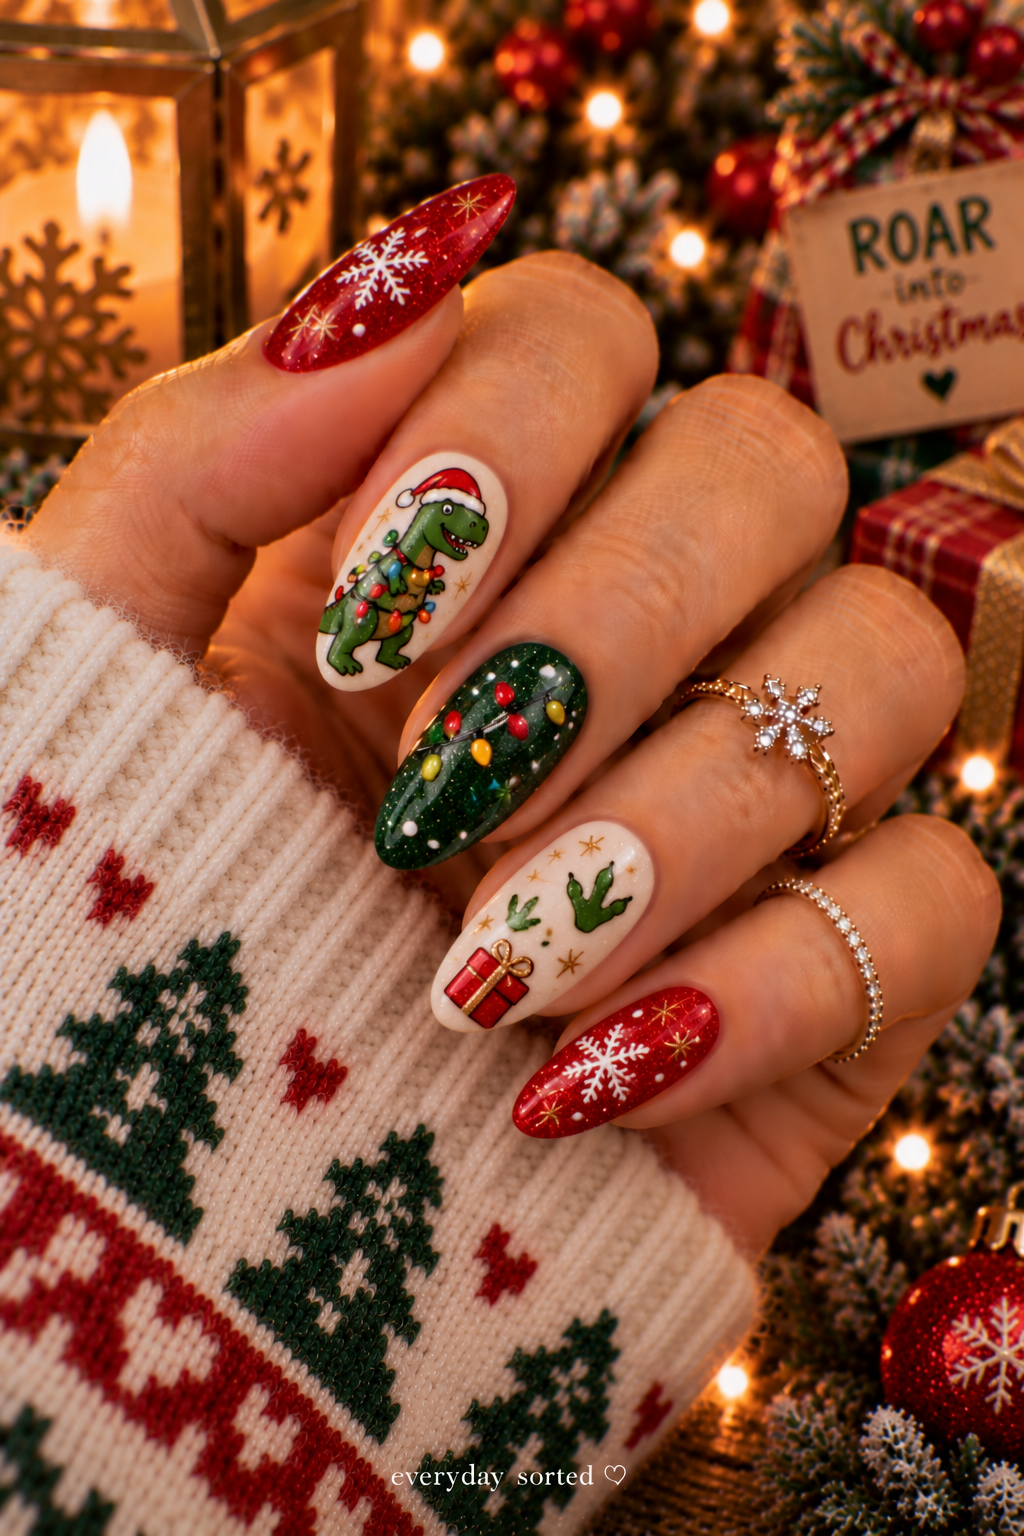
Who says Christmas nail art has to be traditional? A festive dinosaur wrapped in tiny string lights is a cheerful option if you enjoy designs with a little personality. Start with a light background, then paint a small T-rex in green, teal, or your favorite dinosaur shade using a fine brush. Add a curved strand of colorful lights across its body, finishing with tiny dots in red, yellow, blue, and green. You can simplify the dinosaur into a cute silhouette if detailed character art feels intimidating.
Final Thoughts
The nicest Christmas manicure isn’t necessarily the most complicated one—it’s the design that makes you happy when you look down at your hands. You might find yourself drawn to classic candy cane stripes one year and soft cranberry velvet the next, and that’s part of the fun.
If you’re trying nail art at home, start with designs that use fewer colors and simpler details. A sheer base with tiny holly berries, a glitter gradient, or a classic red manicure can look just as lovely as a detailed character design. Give yourself time to let each layer dry, keep a fine brush nearby, and don’t feel like every nail has to match perfectly.
Save your favorite ideas, mix and match the details you love, and make your Christmas nails feel like your own.
Bhai, ab article US English conventions follow karta hai—jaise color, favorite, gray, cozy, toward, aur afterward. Tone bhi friendly aur natural rakhi hai, bina har paragraph ko ek hi style mein likhe.